

In 2025, changing background has become an essential skill across many digital landscapes, from social media to virtual meetings and even in personal content creation. As visual content continues to dominate the digital world, the ability to alter or enhance backgrounds is no longer limited to professional designers. Advanced tools and AI-driven applications have made background editing more accessible than ever, allowing users to quickly swap, remove, or stylize backgrounds with minimal effort.
The power of changing backgrounds goes beyond simple aesthetics. Whether for brand consistency, privacy during virtual meetings, or crafting eye-catching social media posts, the right background can significantly impact the viewer’s experience. Additionally, with the rise of hybrid work environments and online interactions, having control over what appears behind you in a video call has become invaluable. In this guide, we’ll cover everything you need to know about changing backgrounds in 2025—from the best tools and techniques to advanced tips for achieving professional results.
Background Changes: An Overview
In today’s visually driven world, changing backgrounds has become a key element in creating compelling and personalized content. From photographers and social media influencers to educators and business professionals, people across all fields are harnessing background changes to enhance their visuals, build brand identity, and create immersive digital experiences. But what exactly does changing a background entail, and why has it become so popular?
What is Background Change?
Background change refers to the process of removing, replacing, or modifying the backdrop of an image, video, or virtual setting. This can range from a subtle color swap to a complete replacement with a new scene, graphic, or visual effect. The technology behind background changes has evolved quickly, with tools now using AI to detect and remove backgrounds automatically. This allows users to achieve clean, professional-looking changes with minimal effort.
Why is Background Change Important?
Changing backgrounds is valuable in many contexts:
- Professional Image and Branding: Companies use custom backgrounds to convey brand colors, logos, and consistent aesthetics across their visuals.
- Privacy and Control: For video calls, background changes provide privacy by hiding home settings and creating a distraction-free workspace.
- Social Media Appeal: Influencers and content creators use dynamic backgrounds to keep their content visually engaging and on-brand.
- Enhanced Creativity: The ability to control and modify backgrounds opens doors for creative freedom, from placing oneself in dream locations to adding custom visual effects.
Types of Background Changes
- Complete Background Removal: Removing the entire background to isolate the subject.
- Background Replacement: Replacing the current background with a new one, such as a different environment or graphic.
- Color and Style Adjustments: Change the background color, add gradient effects, or apply filters to enhance visual appeal.
- Virtual Backgrounds in Real-Time: Pre-set virtual backgrounds are used for live video calls, often applied through conferencing platforms like Zoom or Teams.
Best Tools for Changing Backgrounds
With rapid advancements in image and video editing technology, there are now numerous tools designed specifically for changing backgrounds. From professional-grade software to user-friendly mobile apps, these tools cater to a wide range of skills, needs, and platforms. Here’s a breakdown of the best tools available for changing backgrounds in photos, videos, and virtual meetings.
Photo Editing Software for Professional Background Changes
- Adobe Photoshop: The industry standard for professional editing, Photoshop offers a robust suite of tools for background changes, including advanced selection tools, layer masking, and blending options. With the recent addition of AI-powered features, users can remove and replace backgrounds with increased speed and accuracy.
- GIMP (GNU Image Manipulation Program): A free alternative to Photoshop, GIMP offers similar capabilities for background removal and replacement. Although it has a steeper learning curve, it provides robust features for those familiar with photo editing.
- Affinity Photo: Known for its user-friendly interface, Affinity Photo offers powerful tools for background manipulation at a one-time cost, making it ideal for those who want professional tools without a subscription.
Online Background Removal Tools
- Remove.bg: This AI-based tool specializes in quick background removal. With a simple upload, Remove. Bg detects the subject and removes the background automatically, which is perfect for users who need fast, hassle-free edits.
- Canva: A popular design tool with a background remover feature included in its Pro subscription. Canva’s drag-and-drop interface makes it easy to replace backgrounds or add custom images, ideal for social media content and marketing graphics.
- Pixlr: A browser-based editing tool that offers powerful background removal tools, including AI-assisted background removal for quick edits. Pixlr is suitable for both beginners and advanced users looking for a free or low-cost solution.
Mobile Apps for On-the-Go Background Changes
- Snapseed: Google’s Snapseed offers a range of powerful editing tools, including background adjustment features like selective editing and healing. Although not as specialized in background removal, Snapseed offers excellent flexibility for mobile editing.
- PhotoRoom: Designed for quick and easy background removal on mobile devices, PhotoRoom is popular among e-commerce sellers and social media creators for creating product shots and personal photos with custom backgrounds.
- Adobe Photoshop Express: This mobile version of Photoshop includes a simplified suite of background manipulation tools with pre-set backgrounds and effects that make it easy to edit on the go.
Video Background Change Tools
- OBS Studio (Open Broadcaster Software): Popular for live streaming, OBS Studio allows users to set up virtual backgrounds using green screen technology. It is ideal for gamers, presenters, and online content creators.
- Adobe Premiere Pro: Adobe’s powerful video editing software includes green screen keying and background manipulation options for professional video projects. It’s an industry favorite for editors looking to create seamless background effects.
- Final Cut Pro: A video editing powerhouse for Mac users, Final Cut Pro offers sophisticated tools for background replacement and effects, particularly with green screen or chroma key footage.
Changing Backgrounds in Photos
Changing backgrounds in photos is a powerful way to enhance or completely transform the look and feel of an image. Whether for professional purposes, creative projects, or just for fun, modern tools make it easier than ever to modify backgrounds with precision and realism. Here’s a comprehensive guide to changing backgrounds in photos, including step-by-step instructions, tools, and tips for achieving the best results.
Step-by-Step Guide for Removing Backgrounds
Removing a background allows you to isolate the main subject of an image and place it on a new backdrop or leave it with a transparent background.
- Step 1: Open the Image in Your Editing Tool
Choose an editing tool that suits your skill level, such as Adobe Photoshop for advanced users or Remove. Bg for quick background removal.
- Step 2: Select the Subject
Use selection tools like Photoshop’s Select Subject or Quick Selection Tool. Many modern tools, such as Canva and Photoshop, offer AI-assisted selection features that detect and outline the subject automatically.
- Step 3: Refine the Selection
Zoom in to refine edges, especially around hair or intricate details, using the Refine Edge or Select and Mask tool in Photoshop. Most tools offer feathering and smoothing options to ensure a natural-looking edge.
- Step 4: Remove the Background
After refining, delete or mask out the background to isolate the subject. Some tools allow you to save the subject as a PNG with a transparent background, which can be used for future designs.
Replacing with a New Background
Once you’ve removed the original background, it’s time to add a new one. Here’s how to achieve a natural look:
- Step 1: Choose a New Background
Select a background that complements the subject in terms of lighting, perspective, and color. Depending on the desired effect, you can use anything from a solid color to a scenic landscape or even custom graphics.
- Step 2: Import and Position the Background
Open or import the new background in your editing software. Position it behind the subject layer, adjusting size and placement to create a realistic composition.
- Step 3: Blend the Subject and Background
Make any necessary adjustments to match lighting and shadows. In Photoshop, tools like Curves, Brightness/Contrast, and Hue/Saturation can harmonize the subject with the new background.
- Step 4: Apply Shadows and Reflections
Adding subtle shadows can help anchor the subject in the new background. Use the Drop Shadow effect or create custom shadows with a soft brush, adjusting opacity for a realistic look.
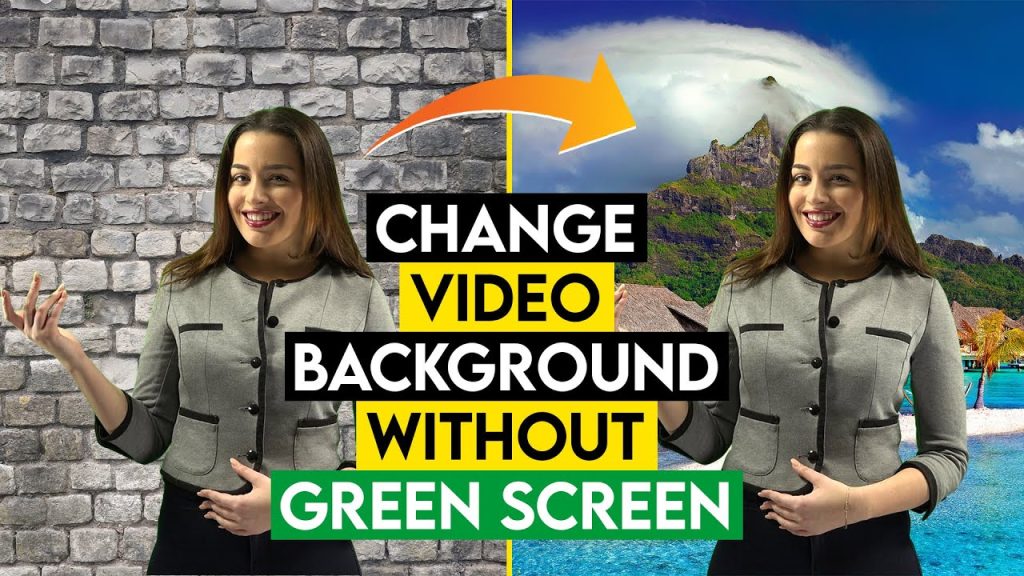
Changing Backgrounds in Videos
Changing the background in a video is a powerful way to transform its setting and mood, create visual effects, and elevate production value. While once a complex process requiring advanced skills, recent software developments have made background changes accessible even to beginners. Whether you’re creating professional content, gaming streams, or video calls, here’s a detailed guide on how to change backgrounds in videos effectively.
Methods for Changing Backgrounds in Videos
There are two primary methods for changing backgrounds in videos:
- Green Screen (Chroma Key): Filming the subject against a green or blue screen allows for easy removal of the background using chroma essential tools. This method provides high-quality results and is ideal for controlled video shoots.
- AI Background Removal: AI-based video editors can now automatically detect and remove the background without a green screen. Though more precise than chroma keying, this method is convenient and can deliver good results for casual content or virtual meetings.
Step-by-Step Guide to Changing Backgrounds with Green Screen
Using a green screen is the most traditional and widely used technique for changing video backgrounds. Here’s how to do it:
- Step 1: Set Up the Green Screen:
Ensure the green screen is evenly lit, with no shadows or wrinkles, as these can interfere with the chroma-critical effect. Natural or studio lighting helps to illuminate the subject separately from the green screen to avoid shadows.
- Step 2: Film the Subject:
Film your subject in front of the green screen, avoiding wearing green to prevent it from blending into the background.
- Step 3: Import the Footage into Editing Software:
Transfer your video to an editing software with chroma key capabilities, such as Adobe Premiere Pro, Final Cut Pro, or DaVinci Resolve.
- Step 4: Apply Chroma Key Effect :
In your editing software, locate the Chroma Key or Keying effect. Select the green color to remove, and adjust settings like tolerance, edge blur, and feathering to refine the removal and eliminate any green edges around the subject.
- Step 5: Add the New Background:
Import and place your chosen background layer beneath the subject layer. Adjust lighting and color grading if necessary to ensure the subject blends naturally into the new setting.
- Step 6: Export the Final Video
After making all necessary adjustments, export your video in the desired format.
Changing Backgrounds with AI-Powered Tools
AI-based tools can now detect and remove video backgrounds automatically, making this method suitable for those without green screens. Here’s how to use AI tools for background changes:
- Step 1: Choose an AI Background Removal Tool:
Select software like Unscreen, Kapwing, or Wondershare Filmora, which offer automatic background removal for videos.
- Step 2: Upload Your Video:
Upload your video to the tool and let the AI process the background. Most tools will automatically isolate the subject and remove the background, though you may need to adjust settings for optimal results.
- Step 3: Replace with a New Background:
Many AI-powered tools allow you to upload a new background or choose from pre-existing options. Once you select the background you want, the software will integrate it into your video.
- Step 4: Edit and Export:
Adjust brightness, contrast, and other settings if needed, then export the video with the new background.
Tips for Perfect Background Changes
Achieving a flawless background change in photos or videos requires attention to detail and an understanding of how various elements work together. Here are some essential tips to help you create seamless, professional background changes that look natural and polished.
- Match Lighting and Shadows
Tip: The lighting of the subject and the background should match in direction, intensity, and color temperature. For instance, if the subject is lit from the right, the background should ideally reflect the same lighting conditions.
How-to: Many editing tools offer options to adjust the lighting. In Photoshop, use Brightness/Contrast or Curves to modify the background lighting. In video editors, you can use similar settings to match the light on the subject and the background.
- Use High-Quality Background Images or Videos
Tip: A low-resolution background can make even a well-edited subject look out of place or unprofessional.
How-to: Choose high-resolution images or video backgrounds that match or exceed the quality of the subject. Look for resources like Unsplash or Adobe Stock, or use a DSLR camera for custom background shots.
- Pay Attention to Color Grading
Tip: Adjust the colors of the subject and background to ensure a consistent color palette.
How-to: Tools like Photoshop’s Color Balance or video software color grading features can help unify the tones. For example, if your background has a warm sunset hue, consider adding a slight warm tint to the subject.
- Feather and Refine Edges
Tip: Hard edges can make the subject look pasted on, especially if there’s okay detail like hair or fur.
How-to: Use feathering tools to slightly soften the edges of your subject. In Photoshop, the Select and Mask tool offers feathering and edge refinement options. For videos, software like Adobe After Effects provides similar masking tools to achieve smooth edges.
- Add Depth with Blurring
Tip: Blurring the background slightly can add a natural depth of field effect, making the subject stand out while giving the background a more realistic appearance.
How-to: Apply a Gaussian Blur or similar blur to the background layer, adjusting the intensity based on how close or far the subject appears from the background. For video, DaVinci Resolve and Premiere Pro offer depth-of-field effects.
- Consider Adding Shadows and Reflections
Tip: Adding shadows under or beside the subject helps anchor them to the background, creating a natural, cohesive look.
How-to: Use a soft, low-opacity brush to add shadows, adjusting for light direction and intensity. In Photoshop, the Drop Shadow effect can be a good start, and in video editing, After Effects allows you to create realistic shadow effects under the subject.
Frequently Asked Questions (FAQs)
Changing backgrounds in photos or videos can be a game-changer for your content, whether for professional media or personal projects. Here are some common questions and answers to help guide you through the process:
What is the best way to change the background in a video?
The best way to change the background in a video is by using a green screen or chroma critical effect. This technique allows you to film your subject in front of a green or blue screen and then replace the background with a digital image or video. Alternatively, AI-based tools like Unscreen and Kapwing allow you to change backgrounds without needing a green screen, but the results may vary.
Do I need a green screen to change a video background?
No, a green screen is not always necessary. While it provides the cleanest and most professional results, there are AI-powered tools that can automatically remove and change backgrounds without requiring a green screen. However, using a green screen tends to offer better accuracy and control over the process.
What software do I need to change backgrounds in photos?
For changing backgrounds in photos, popular software options include:
- Adobe Photoshop: Best for manual background removal and advanced editing.
- Canva: A simple and user-friendly online tool for quick background changes.
- Remove.bg: An automatic tool for removing backgrounds with just one click.
How do I add a new background after removing the old one?
After removing the old background, simply insert your new background layer behind the subject. In Photoshop, this can be done by dragging and dropping the new background onto the workspace and positioning it below the subject’s layer. In video editing software, add the new background in a separate layer and adjust it to fit the frame.
What should I do if my subject has frizzy hair or detailed edges that don’t blend well?
For detailed edges, use tools like feathering or edge refinement to soften and smooth out the selection. In Photoshop, the Select and Mask feature helps refine areas with fine details, like hair. In video editing software, you can use masking tools to fine-tune these areas and make them blend more naturally with the new background.
Can AI tools change video backgrounds automatically?
Yes, AI tools like Unscreen, Kapwing, and Wondershare Filmora can automatically detect and remove video backgrounds. These tools use artificial intelligence to isolate the subject and replace the background without the need for a green screen, making them convenient for casual users or quick edits.
What type of lighting should I use for a green screen setup?
Proper lighting is essential for a clean green screen effect. Use soft, even lighting to illuminate the green screen and the subject. Make sure there are no shadows or hotspots on the screen. Lighting the subject separately from the green screen will prevent color spill (when the green screen reflects onto the subject) and help maintain a clean key.
Conclusion
Changing backgrounds in photos and videos has become an essential skill in the digital age, whether for personal projects, professional media, or creative content creation. With the advancement of technology, tools, and AI, the process has become more accessible and precise, allowing users of all skill levels to achieve seamless results.
To ensure your background changes look natural and professional, you must pay attention to key factors like lighting, perspective, edge refinement, and color grading. Using the right tools, such as Adobe Photoshop, Canva, Unscreen, and other specialized software, can make the process much easier and more effective.