

In the age of social media and high-resolution photography, achieving a flawless, natural look in portraits has become a famous goal. From influencers to everyday users, face-smoothing effects are now a staple in photo editing. Snapseed, one of the most influential and free photo-editing apps, has risen as a favorite among users looking for professional results without the need for extensive editing knowledge. One feature making waves among Snapseed enthusiasts is the Axig_p_pf1e face-smoothing effect, which has quickly gained popularity for its subtle yet effective results.
In this guide, we’ll dive deep into everything you need to know about the Axig_p_pf1e effect—what it is, how it works, and, most importantly, how you can apply it to your photos using a QR code. Whether you’re looking to enhance your selfies or edit professional portraits, this tutorial will walk you through setting up the effect, troubleshooting any joint issues, and perfecting your edits for that clean, smooth finish. By the end of this guide, you’ll have all the tools you need to make the most of the Axig_p_pf1e filter, giving your photos the polished, magazine-worthy look you’ve always wanted.
What is the Axig_p_pf1e Effect?
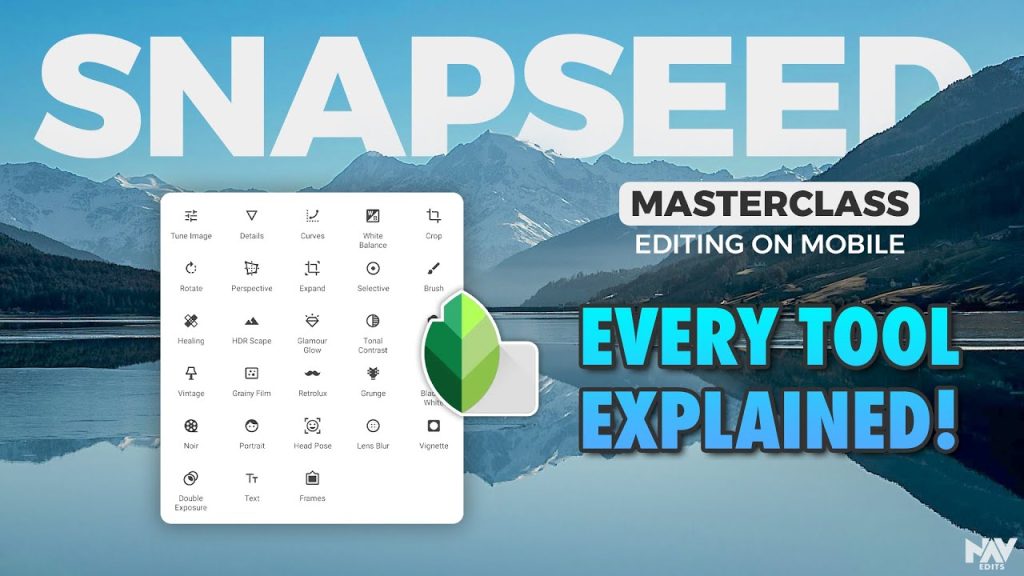
The Axig_p_pf1e effect is a specific face-smoothing filter used within the popular photo-editing app Snapseed. It is designed to deliver a balanced, natural-looking finish to portraits. This effect has gained popularity among Snapseed users because it softens facial textures, reduces blemishes, and enhances skin tones without making the image look overly edited or artificial. The Axig_p_pf1e filter is particularly loved for its ability to create that “flawless skin” look often seen in professional photography while retaining key details that keep the image feeling authentic.
How to Generate and Share Your Axig_p_pf1e QR Code
Creating a custom QR code for your personalized Axig_p_pf1e face-smoothing effect in Snapseed allows you to easily share your unique edit settings with friends, social media followers, or fellow Snapseed users. This feature makes it simple to replicate the exact look across multiple photos or devices without manually adjusting settings each time.
Customize the Axig_p_pf1e Effect in Snapseed
- Step 1: Open Snapseed and load the photo you want to edit.
- Step 2: Apply the Axig_p_pf1e effect by manually adjusting the settings or scanning an existing Axig_p_pf1e QR code if you have one.
- Step 3: Fine-tune the effect to your liking by adjusting brightness, contrast, smoothing levels, and other details. You can layer additional tools in Snapseed, like ‘Healing,’ ‘Details,’ or ‘Tone Adjustments’, to create a truly customized look.
- Step 4: Once you’re satisfied with your adjustments, save these edits so you can generate a QR code based on your custom settings.
Save and Create Your Custom QR Code
- Step 1: Tap the ‘Export’ button, typically located at the bottom of the screen.
- Step 2: Select the ‘QR Look’ option. This feature allows Snapseed to save your current set of edits as a QR code, making it easy to reapply your custom settings to other photos or share them with others.
- Step 3: Name your custom QR code to identify it as your Axig_p_pf1e effect (for example, “Axig_p_pf1e Custom Smooth”). This step helps quickly identify it among other saved edits.
- Step 4: Snapseed will generate a QR code that you can either save to your device’s photo gallery or share directly with others.
Sharing Your Axig_p_pf1e QR Code with Others
- Option 1: Share Directly via Social Media or Messaging Apps
- From the saved QR code, open your device’s sharing options and choose a platform, like Instagram, Facebook, or WhatsApp, to share the code directly.
- This allows your followers or friends to scan and use the same effect with ease.
- Option 2: Create a Tutorial or Post on Social Media
- Post the QR code on platforms such as Instagram, TikTok, or Twitter, accompanied by a brief tutorial on how to scan and apply the effect in Snapseed. This can engage your audience and inspire others to try the effect.
- Option 3: Add a Watermark for Branding
- For users with a social media following, consider adding a watermark to your QR code image before sharing. This helps promote your brand while still providing a valuable tool for your audience.
- Option 4: Email or Text the QR Code to Specific Users
- If you’re sharing with a small group or specific individuals, emailing or texting the QR code directly is a quick and effective option.
How to Use the Axig_p_pf1e Effect in Snapseed
Utilizing the Axig_p_pf1e effect in Snapseed can dramatically enhance your portrait photography, allowing you to achieve a smooth, professional finish. Whether you’re a novice or an experienced editor, the process is straightforward and effective. Here’s a step-by-step guide to help you apply the Axig_p_pf1e effect to your photos.
Download and Install Snapseed
- Step 1: Ensure you have Snapseed Qr Code installed on your device. It’s free on iOS and Android.
- Step 2: Open the app after installation.
Import Your Photo
- Step 1: Tap the “+” icon or “Open” to import the image you wish to edit.
- Step 2: Choose a photo from your device’s gallery. Portraits work best for this effect.
Apply the Axig_p_pf1e Effect Using a QR Code
If you have already created or obtained the Axig_p_pf1e QR code, follow these steps:
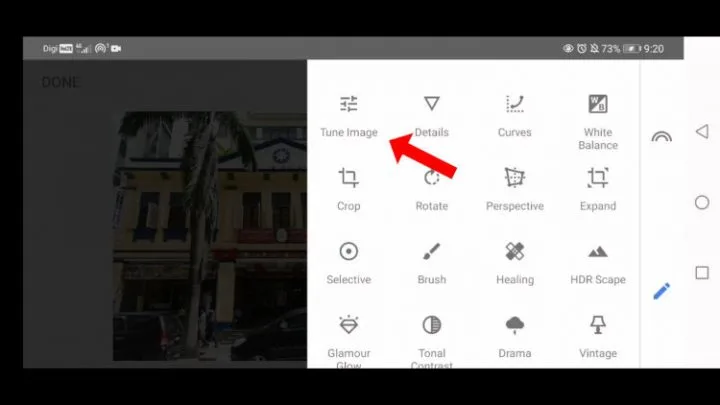
- Step 1: Tap the “Tools” tab at the bottom of the screen.
- Step 2: Select “QR Look” from the list of tools.
- Step 3: Use your camera to scan the Axig_p_pf1e QR code.
- Step 4: The effect will automatically apply to your photo.
If you don’t have the QR code yet, you can manually apply the smoothing effects as follows.
Manually Apply Face Smoothing Effects
If you’re opting to create a customized effect, follow these steps to manually replicate the Axig_p_pf1e look:
- Step 1: After loading your photo, tap on the “Tools” tab.
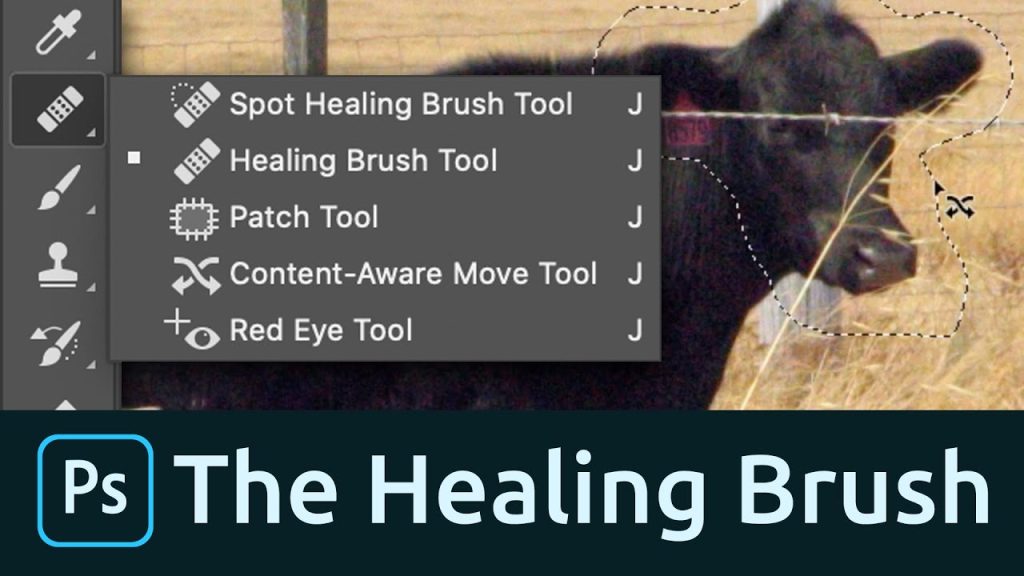
- Step 2: Select “Healing” to remove any noticeable blemishes or distractions. Use your finger to tap on areas to heal.
- Step 3: Go back to the “Tools” tab and select “Details”. Adjust the Structure and Sharpening sliders to enhance facial features slightly.
- Step 4: Navigate to “Tune Image.” Here, adjust parameters like Brightness, Contrast, and Saturation to complement the skin tone.
- Step 5: Finally, select “Selective” from the Tools. Use this feature to apply localized adjustments, emphasizing smoother skin tones while retaining natural texture.
Fine-Tune the Effect
- Step 1: Once the Axig_p_pf1e effect is applied, you should fine-tune the results.
- Step 2: Tap on the “Brush” tool to manually adjust areas of the photo. Use the “Dodge” and “Burn” features to lighten or darken specific areas for added depth.
- Step 3: Adjust the opacity of any applied brushes or tools to achieve a more natural look.
Save and Export Your Edited Photo
- Step 1: When you’re satisfied with the results, tap on the “Export” button (usually located at the bottom right).
- Step 2: Choose your preferred option—save to your device, share directly to social media, or create a new QR Look for future use.
Share Your Results
- Step 1: Once saved, consider sharing your edited photo on social media platforms, tagging it with hashtags related to Snapseed, photo editing, or face smoothing.
- Step 2: If you’ve created a custom QR code, share it alongside your photo to allow others to replicate the Axig_p_pf1e effect easily.
Read more: Lightroom d0fudhbstqe= Snapseed QR Code
Best Practices for Face Smoothing in Snapseed
Achieving a flawless, smooth complexion in your portraits using Snapseed requires a balance of practical techniques and subtle adjustments. Here are some best practices to consider when applying face smoothing effects, explicitly focusing on the Axig_p_pf1e effect and other complementary tools within the app.
Start with a High-Quality Image
Choose the Right Photo: For the best results, use high-resolution images with good lighting. Well-lit photos allow Snapseed’s tools to work effectively and yield a more polished look.
Consider Backgrounds: Ensure the background complements your subject without distracting from its features.
Use the Healing Tool Wisely
Target Specific Areas: Use the Healing tool to remove blemishes, acne, or scars. Tap on the imperfections and let Snapseed blend the area seamlessly with surrounding skin tones.
Be Subtle. Overusing the Healing tool can lead to unnatural results. Focus on small areas rather than large patches of skin.
Apply the Axig_p_pf1e Effect Thoughtfully
QR Code Application: If you’re using the Axig_p_pf1e effect via a QR code, ensure it’s scanned correctly and is the latest version for the best performance.
Adjust Settings: After applying the effect, don’t hesitate to fine-tune it. Adjust the intensity of the effect to match your desired look, ensuring it appears natural and not overly edited.
Use Selective Adjustments for Precision
Utilize the Selective Tool: This feature allows you to apply edits to specific areas of the photo, such as brightening or smoothing only the face while leaving the background untouched.
Blend Edges: When making localized adjustments, ensure smooth transitions between edited and non-edited areas to maintain realism.
Fine-Tune with Brush Tools
Dodge and Burn: Use the Brush tool to lighten or darken specific areas. This technique can help create shadows and highlights, adding depth to the face while smoothing out imperfections.
Opacity Control: Adjust the opacity of your brush strokes to ensure they blend well with the overall image, allowing for a more natural appearance.
Combine Effects for Enhanced Results
Layer Effects: Don’t rely solely on the Axig_p_pf1e effect. Combine it with other tools like “Details” to enhance sharpness and “Tune Image” to adjust brightness and contrast for a well-rounded edit.
Experiment with Filters: Try using Snapseed’s filters to add a creative touch to your portraits, enhancing mood and color while maintaining smooth skin.
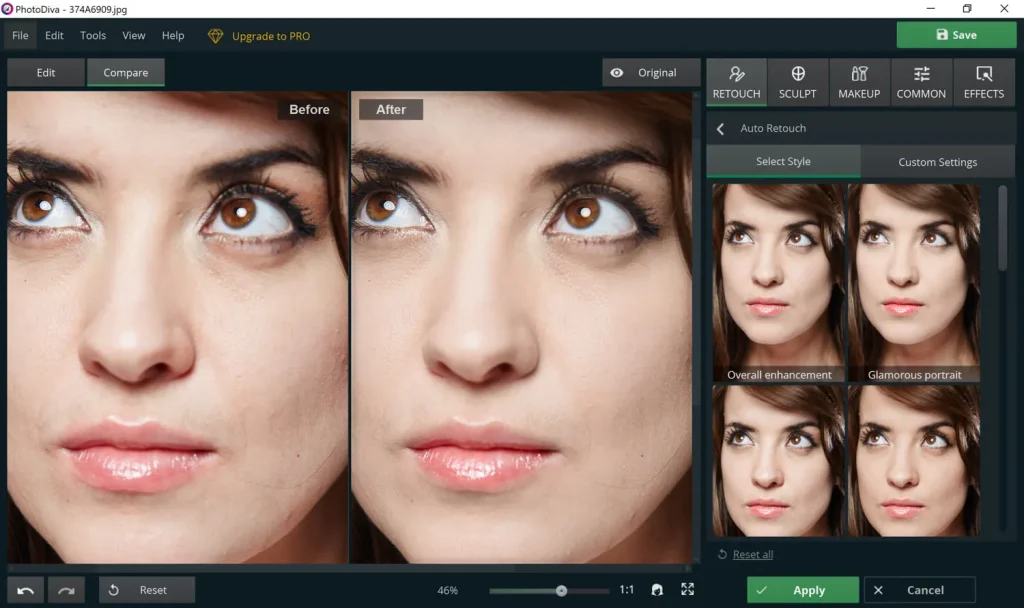
Preview and Compare Edits
Before and After: Regularly toggle between the edited and original images to assess your changes. This practice helps ensure that the smoothing effect remains realistic.
Seek Feedback: Get a second opinion from friends or peers. Fresh eyes can provide valuable insights into whether the smoothing looks natural.
Save and Share Responsibly
Export in High Quality: When saving your final image, choose the highest quality settings available to retain detail and clarity.
Use Watermarks: If sharing on social media, consider watermarking your images to protect your work and promote your brand.
Know When to Stop
Avoid Over-Editing: It can be tempting to smooth skin excessively, but over-editing often leads to an unrealistic appearance. Strive for a balance between smoothing and retaining natural skin texture.
Embrace Imperfections: Sometimes, minor imperfections add character to an image. Embrace natural features rather than aiming for absolute perfection.
Alternatives to the Axig_p_pf1e Effect for Face Smoothing
While the Axig_p_pf1e effect offers a convenient way to achieve a smooth, polished look in your photos, there are several alternative methods and tools within Snapseed that can also help you enhance your portraits. Here are some practical alternatives for face smoothing that can deliver impressive results:
Portrait Tool
Overview: Snapseed’s Portrait tool is specifically designed to enhance facial features. It automatically applies enhancements to faces, improving skin texture, eyes, and lighting.
How to Use:
Open your image and select “Tools”.
- Choose “Portrait” and let the app analyze the face.
- Adjust the settings such as Face Spotlight, Glow, and Skin Smooth to achieve the desired level of smoothing and brightness.
Healing Tool
Overview: The Healing tool can target specific blemishes, spots, or imperfections without affecting the overall skin texture.
How to Use:
Select “Tools”, then choose “Healing”.
- Tap on blemishes or imperfections to remove them. Use small strokes for the best results, ensuring a natural look.
Brush Tool (Dodge and Burn)

Overview: The Brush tool allows for precise adjustments to lighten or darken specific areas of the photo. This technique can enhance facial features while smoothing skin.
How to Use:
Go to “Tools,” select “Brush,” and choose either the Dodge or Burn feature.
- Lighten areas (e.g., forehead, cheeks) to create a smooth, illuminated effect or darken areas for depth and contouring.
Tune Image
Overview: The Tune Image feature adjusts the overall exposure, contrast, and saturation of the photo, which can contribute to a smoother appearance.
How to Use:
Access “Tools,” then choose “Tune Image.”
- Adjust the Brightness, Contrast, and Saturation sliders to enhance the photo. A subtle increase in brightness can help smooth out shadows on the face.
Selective Adjustments
Overview: Selective adjustments allow you to enhance specific areas of the image without affecting the entire photo, making it ideal for targeted smoothing.
How to Use:
- Choose “Tools”, then select “Selective”.
- Tap on the area you want to adjust and use the sliders to modify Brightness, Contrast, and Saturation. This can help smooth skin tones and selectively enhance facial features.
Pros and Cons of the Axig_p_pf1e Effect in Snapseed
The Axig_p_pf1e effect is a popular feature within Snapseed, offering users a convenient way to enhance their portrait photography. However, like any tool, it comes with its own set of advantages and disadvantages. Below is a detailed overview of the pros and cons of using the Axig_p_pf1e effect.
Pros
- Effective Smoothing Flawless Skin: The Axig_p_pf1e effect excels at smoothing skin texture, reducing the appearance of blemishes, wrinkles, and other imperfections for a polished look.
- User-Friendly Implementation QR Code Access: The effect is easily accessible via a QR code scan, making it straightforward for users to apply without complex processes.
- Customizable Intensity Personalization: Users can adjust the strength of the effect, allowing for a tailored approach that can suit individual preferences and varying image requirements.
- Quick Editing Time-Saving: The Axig_p_pf1e effect allows for rapid enhancements, making it ideal for users who need to edit multiple images quickly, such as social media managers and photographers.
- Versatility Wide Application: It can be used effectively across different portrait styles, from casual selfies to professional headshots, catering to various user needs.
- Improved Overall Aesthetics Enhanced Visual Appeal: The effect contributes to a more appealing overall image quality, which can be beneficial for branding and marketing.
- Works Well with Other Tools Comprehensive Editing: The Axig_p_pf1e effect can be seamlessly integrated with other Snapseed tools, allowing for a more holistic editing approach.
- Consistent Results Uniform Quality: Regular users benefit from consistent results across their edits, helping to establish a recognizable editing style.
- Accessible to All Skill Levels No Advanced Skills Needed: The simplicity of the effect makes it suitable for both beginners and experienced photographers.
- Increases Confidence in Sharing Professional Finish: The ability to produce polished images can boost users’ confidence when sharing their work on social media or portfolios.
Cons
- Over-Smoothing Risk Unnatural Appearance: If applied too heavily, the effect can lead to an overly smooth and unnatural look, detracting from the subject’s realism.
- Limited Detail Preservation Loss of Texture: While the effect smooths skin, it may also blur important facial details, resulting in a loss of character and depth.
- Dependence on Quality Input Images Requires Good Source Material: The effectiveness of the Axig_p_pf1e effect relies heavily on the quality of the original image. Only lit or low-resolution photos may yield satisfactory results.
- Learning Curve for Best Use Finding the Right Balance: While user-friendly, new users may still face a learning curve when determining the optimal settings to achieve their desired effect.
- Limited to Snapseed Environment No Cross-Platform Application: The Axig_p_pf1e effect is specific to Snapseed and cannot be transferred or used in other photo editing software, which may limit some users’ flexibility.
- Potential for Over-Reliance Editing Dependency: Users might become too reliant on this effect, neglecting to learn other essential editing techniques that could enhance their skills.
- Device Compatibility Issues Variable Performance: The effect’s performance may vary depending on the device’s processing power, potentially leading to inconsistent results across different platforms.
- Social Media Impact Expectations vs. Reality: The widespread use of such effects can create unrealistic beauty standards on social media, influencing how individuals perceive their images and self-worth.
- Limited Customization Beyond Smoothing Focus on Smoothing: While the effect is excellent for skin smoothing, it may not address other aspects of portrait enhancement, requiring additional edits for a complete look.
- Not Suitable for All Portraits Specific Use Cases: The effect may only be appropriate for some types of portraits, such as those that emphasize natural beauty or artistic expressions.
Common Issues with Face Smoothing Effects in Snapseed and How to Fix Them
While Snapseed’s face smoothing effects, including the Axig_p_pf1e effect, offer great tools for enhancing portraits, users often encounter various challenges that can detract from the overall quality of their images. Below are some common issues, along with solutions to address them effectively.
Over-Smoothing
Issue: Applying the face smoothing effect too heavily can result in an unnatural, plastic-like appearance, stripping away the natural texture of the skin.
Fix:
- Adjust Intensity: Use the sliders in Snapseed to reduce the smoothing effect’s strength. Aim for a subtle enhancement that maintains some skin texture.
- Use Selective Adjustments: Instead of applying the effect globally, use Snapseed’s selective tool to target only areas that need smoothing, such as blemishes or uneven skin.
Loss of Detail
Issue: Excessive smoothing can blur important facial features like eyes, eyebrows, and lips, leading to a loss of definition.
Fix:
- Layering Effects: After applying the smoothing effect, consider adding a sharpening layer to the areas of the face that require more definition, like the eyes or lips.
- Selective Focus: Use the brush tool to apply the smoothing effect selectively only to certain areas, avoiding high-detail features.
Uneven Application
Issue: Sometimes, the effect may not apply evenly, resulting in patches of smoothed skin alongside areas that retain their original texture.
Fix:
- Manual Touch-Ups: After applying the effect, use the Healing tool to touch up areas that appear uneven. This can help create a more uniform look.
- Refine Edges: Carefully adjust the edges where the smoothing starts and stops, ensuring a seamless transition between smooth and textured areas.
Incompatibility with Original Image Quality
Issue: Low-resolution or poorly lit images may not respond well to face-smoothing effects, leading to disappointing results.
Fix:
- Pre-Edit Enhancements: Before applying the smoothing effect, use Snapseed’s tuning tools (such as brightness, contrast, and saturation) to improve the overall quality of the image.
- Use High-Quality Images: Whenever possible, start with high-resolution images to ensure better results without any editing effects.
Unnatural Skin Tone
Issue: Smoothing effects can sometimes alter the skin tone, making it appear washed out or overly warm.
Fix:
- Color Correction: After applying the smoothing effect, use the ‘Tune Image’ feature to adjust the brightness, contrast, and saturation, restoring a natural skin tone.
- Selective Color Adjustments: If needed, use the selective tool to target and adjust color specifically in the skin areas.
Frequently Asked Questions about the Axig_p_pf1e Effect and Snapseed
Axig_p_pf1e effect in Snapseed is a widely used tool for enhancing portrait images by providing a face smoothing feature. However, users often need clarification regarding its functionality, application, and best practices. Below are some frequently asked questions (FAQs) along with their answers to help clarify common inquiries.
Can I adjust the intensity of the Axig_p_pf1e effect?
Yes, Snapseed allows users to adjust the intensity of the Axig_p_pf1e effect. After applying the effect, you can use the sliders to increase or decrease the level of smoothing according to your preference.
Does the Axig_p_pf1e effect work on all types of images?
While the Axig_p_pf1e effect is designed primarily for portrait images, its effectiveness can vary based on the quality and lighting of the original image. High-resolution and well-lit images yield better results. It may not be suitable for images that emphasize natural textures or artistic styles.
Can I use the Axig_p_pf1e effect in conjunction with other Snapseed tools?
Absolutely! The Axig_p_pf1e effect can be combined with other Snapseed tools for a more comprehensive editing approach. For instance, you can use it alongside color correction, sharpening, and exposure adjustments to enhance your images further.
How do I share my edited images with the Axig_p_pf1e effect?
Once you have applied the Axig_p_pf1e effect and are satisfied with your edits, tap on the Export option in Snapseed. You can save the edited image to your device, share it directly to social media, or send it via messaging apps.
Is the Axig_p_pf1e effect available on all devices?
The Axig_p_pf1e effect is available on devices that support Snapseed, including iOS and Android platforms. However, performance may vary depending on the device’s processing power, which could affect its application.
Are there any alternatives to the Axig_p_pf1e effect for face smoothing?
Yes, Snapseed offers other tools for face smoothing, such as the Brush tool for manual adjustments or the Healing tool to remove specific blemishes. Additionally, different apps and software may provide similar smoothing effects that you can explore.
Can I create and share my own QR code for the Axig_p_pf1e effect?
Yes, users can create and share their own QR codes for custom Snapseed effects. You can save your edited settings and generate a QR code, which can be shared with others for easy access to your unique editing style.
Conclusion
The Axig_p_pf1e effect in Snapseed represents a significant advancement in digital photo editing, particularly for enhancing portrait photography. With its powerful face smoothing capabilities, it allows users to achieve a polished and professional look while retaining the natural beauty of their subjects. Throughout this guide, we’ve explored the functionalities, applications, benefits, and best practices associated with this effect, equipping users with the knowledge needed to make the most of their Snapseed editing experience.
By understanding how to properly apply and adjust the Axig_p_pf1e effect, users can create stunning images that stand out on social media, portfolios, and personal collections. Furthermore, addressing common issues and questions empowers users to troubleshoot and refine their editing techniques, leading to consistently impressive results.
As you continue to explore the features of Snapseed, don’t hesitate to experiment with various tools and effects, including the Axig_p_pf1e. With practice and creativity, you can transform ordinary photos into extraordinary works of art that highlight the best features of your subjects. Whether you’re a novice looking to improve your photography or a seasoned editor seeking new ways to enhance your images, Snapseed offers a versatile platform for all your editing needs. Happy editing!