

In the digital age, where images are the primary form of communication across social media, websites, and even professional portfolios, mastering the art of stylish photo editing has become a crucial skill. Whether you’re an aspiring photographer, a social media influencer, or someone simply looking to elevate your photos, understanding how to craft stunning, eye-catching edits can make all the difference.
Stylish photo edits enhance an image’s aesthetic appeal and allow you to convey emotions, tell stories, and capture attention in a crowded digital space. With the right tools, techniques, and creative vision, anyone can transform a simple photo into a work of art that stands out in an oversaturated visual world.
What Are Stylish Photo
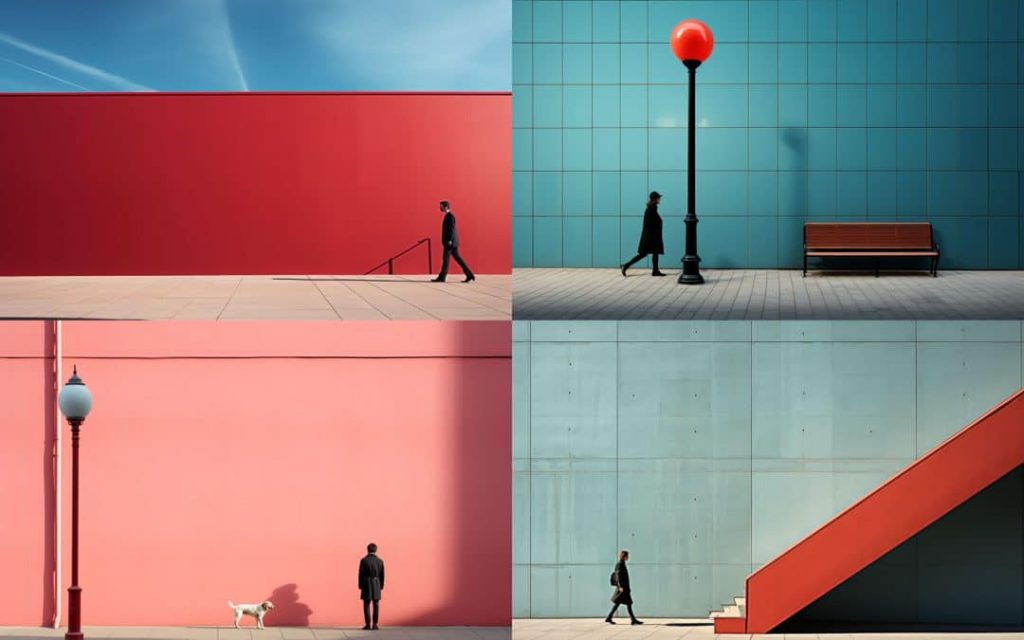
Stylish Photos refer to images that stand out due to their unique, visually appealing qualities, often enhanced through creative editing techniques, composition, or artistic choices. These photos convey a sense of aesthetic sophistication and are typically designed to capture attention and evoke emotions. A “stylish” photo feels visually polished, fashionable, or artistic, often using elements like color grading, composition, lighting, and mood to enhance its overall appeal.
Examples of Stylish Photos:
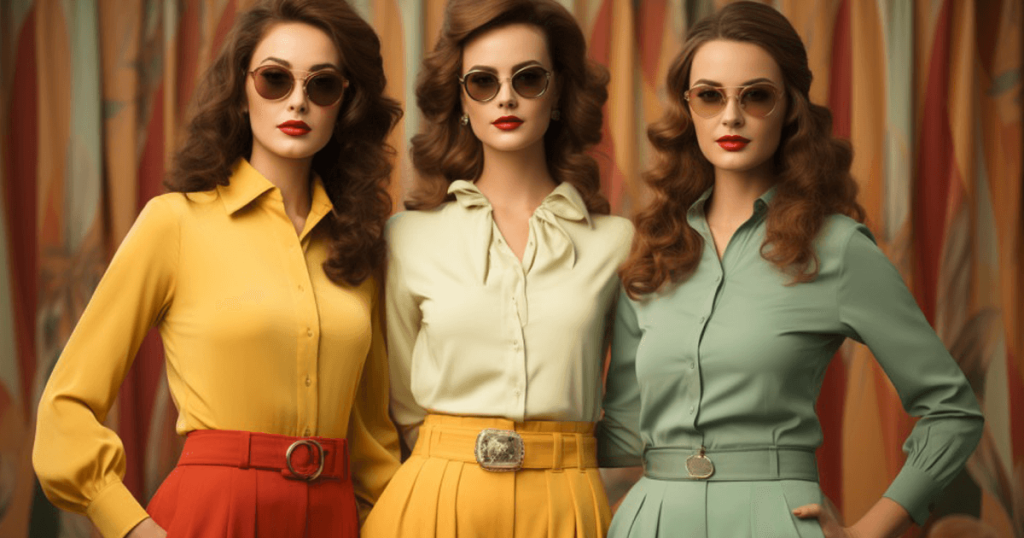
- Fashion Photography: Well-lit portraits or editorial images showcasing fashion, often with a trendy color palette or bold styling.
- Lifestyle Shots are images that capture everyday moments but with a polished, artistic look (such as coffee on a beautifully arranged desk or a scenic outdoor landscape).
- Portrait Photography: Portraits with soft lighting, reasonable composition, and a sense of personality, often with a bokeh effect (blurry background).
- Architectural Photography: Stylish images of buildings, interiors, or cityscapes with solid lines and unique angles, possibly enhanced with dramatic contrasts.
Step-by-Step Guide: How to Create a Stylish Photo Edit for Beginners
Editing photos can be an exciting way to enhance your images and express your creativity. Whether you’re looking to make your photos look more professional or simply want to give them a unique touch, this beginner-friendly guide will walk you through the process of creating stylish photo edits from start to finish.
Choose the Right Photo Editing Tool
Before you start, choose the right photo editing software that suits your needs and skill level. Here are some beginner-friendly options:
- Snapseed (Mobile app, accessible, easy to use)
- Adobe Lightroom (Available on mobile and desktop, offers both free and paid versions)
- Canva (Great for quick edits, especially if you want to create social media posts)
- VSCO (Mobile app with simple editing tools)
- PicsArt (Mobile app, popular for creative edits)
For beginners, Canva or Snapseed are good starting points, as they are easy to navigate and have intuitive tools.
Upload Your Photo
Once you’ve selected your editing tool, you should upload the photo you want to edit.
- Canva: Simply create a new design and drag your image into the workspace.
- Snapseed/Lightroom: Open the app, select “Edit,” and import the image from your gallery or files.
Crop and Straighten Your Image
Cropping and straightening your photo can make a big difference in improving its composition. Here’s how:
- Cropping: Adjust the crop to remove distractions or to focus on the subject. For a professional look, consider following the rule of thirds (divide your image into a 3×3 grid and place essential elements along these lines).
- Straighten: If your photo looks tilted, use the straighten tool to align the horizon or critical elements properly.
Tip: Use a 4:5 aspect ratio if you plan to post on Instagram, as it’s the most effective size for photos.
Adjust Exposure and Brightness
Making basic adjustments to exposure and brightness can instantly improve the look of your photo. Here’s how:
- Brightness: Increase brightness to lighten up your image if it appears too dark or decrease it if it’s too bright.
- Contrast: Increase contrast to make the dark areas darker and light areas lighter, giving the image more depth.
- Exposure: Adjust the exposure for overall brightness. If your image looks overexposed (too bright), decrease it; if it’s underexposed (too dark), increase it.
Tip: Subtle changes in exposure and contrast can make your photo look more dynamic without overdoing it.
Enhance Colors (Saturation and Vibrance)
Colors play a crucial role in creating a stylish look. You can adjust two main aspects of color: saturation and vibrance.
- Saturation: Increases or decreases the intensity of all colors in the photo. Be careful not to overdo it, as too much saturation can make the colors look unnatural.
- Vibrance: This is similar to saturation but more focused on boosting the muted colors. It is often a better option for beginners because it avoids making the colors look too harsh.
Tip: Boost vibrance to make colors pop while maintaining a natural feel. If you want a more moody look, lower the saturation a little.
Apply Filters or Presets
For a quick and stylish edit, applying filters or presets is an easy way to give your photo a unique look.
- Filters: Many apps (like Canva, Snapseed, or VSCO) have a variety of built-in filters. These can instantly transform the mood of your photo (e.g., giving it a vintage or warm tone).
- Presets: Lightroom offers presets that apply a series of adjustments at once (color correction, tone adjustment, etc.), giving you a consistent style across your images.
Tip: Use filters subtly. More filters can make the photo look natural. Adjust the intensity of the filter to suit the style you’re going for.
Sharpen the Image
Sharpening helps bring out details, especially in the subject of your photo. It can enhance clarity and make the image look more professional.
- How to sharpen: Use the sharpening tool available in most editing apps. Increase sharpness slightly, but avoid overdoing it, as too much sharpening can make the photo look grainy.
Tip: Zoom in and check for any unwanted noise (graininess) that may appear after sharpening, and adjust accordingly.
Save and Export Your Edited Photo
Once you’re happy with your edits, it’s time to save and export the photo. Ensure you choose the correct file format and resolution based on where the image will be used.
- File Format: JPEG is commonly used for photos, while PNG is ideal for images with transparency.
- Resolution: 72 DPI (dots per inch) is fine for social media or web use. For print, aim for 300 DPI.
- Export Settings: Choose the appropriate file size (not too large to ensure quick loading, but high enough quality for clarity).
Tip: If you’re sharing your photo on social media, consider saving it in the recommended size and aspect ratio for that platform to ensure it displays nicely.
Share Your Stylish Photo
Now that your photo is edited and ready, it’s time to share it with the world!
- For Social Media, Post your stylish photo with an engaging caption on your chosen platform (Instagram, Facebook, Twitter, etc.).
- For Personal Use: Print it out, create a photo album, or use it in other projects.
Tip: Experiment with different styles and techniques to develop your signature editing style.
Advanced Techniques for Stylish Photo Edits
Once you’ve mastered the basics of photo editing, it’s time to elevate your skills and explore advanced techniques that will give your images a unique, professional look. These methods require a deeper understanding of editing tools and creative vision, but with practice, they can unlock new levels of artistry. Below, we’ll explore advanced techniques for stylish photo edits that can transform an ordinary photo into something truly spectacular.
Dodging and Burning
What It Is: Dodging and burning are techniques used to lighten (dodge) or darken (burn) specific areas of a photo to enhance shadows, highlights, and overall depth.
How to Edit:
- Dodging: Lighten specific areas of an image to bring out highlights, like the top of a subject’s head or a bright area in the background.
- Burning: Darken areas of the image to emphasize shadows, such as under a subject’s chin or the darker portions of a landscape.
Tip: These techniques are subtle but powerful. Use them to create depth and drama, especially in portraits or product photography, where light and shadow can dramatically change the mood.
Frequency Separation for Skin Retouching
What It Is: Frequency separation is an advanced technique for retouching skin while maintaining natural texture and detail. It separates an image into two layers: one for color (lower frequency) and one for texture (high frequency).
How to Edit:
- Separate Layers: Split your image into two layers—one for colors and one for textures. Use the color layer to smooth out skin tones and the texture layer to retain details like pores and fine lines.
- Apply Adjustments: After separating the frequencies, you can apply different adjustments to each layer without affecting the other.
Tip: Frequency separation is perfect for high-end fashion or portrait photography, where smooth, flawless skin is desired without sacrificing realism. This technique is intricate, so it may take time to master.
Color Grading for Mood and Atmosphere
What It Is: Color grading involves adjusting the colors of an image to create a specific mood or atmosphere. It’s often used in film and professional photography to convey emotional impact.
How to Edit:
- Use LUTs (Look-Up Tables): LUTs are presets that adjust colors in your photo to achieve specific effects, like a warm vintage look or a cold, cinematic feel.
- HSL Adjustments: Use the Hue, Saturation, and Luminance (HSL) sliders to fine-tune individual colors in the image, giving you more control over the palette.
Tip: Experiment with different LUTs or create your color scheme to match the tone you want for your image. Color grading can transform a photo into an artistic expression of emotion.
Adding Creative Textures and Overlays
What It Is: Textures and overlays add depth, interest, and unique stylistic elements to a photo. They can range from subtle grain or paper textures to more complex artistic overlays like paint strokes, light leaks, or bokeh effects.
How to Edit:
- Use Overlay Layers: Place texture or overlay images above your base photo in separate layers. Set the layer’s blending mode to something like “Overlay” or “Soft Light” to blend it naturally with the image.
- Adjust Opacity: Fine-tune the opacity of the texture or overlay to control its intensity, ensuring it enhances the image without overwhelming it.
Tip: Textures and overlays can add visual complexity to photos, but be careful not to overdo it. Keep the focus on your subject while enhancing the environment or mood with textures.
Composite Editing (Creating Stunning Photo Compositions)
What It Is: Composite editing is the technique of combining multiple images or elements into a single frame. This is often used in digital art, advertising, and surreal photography to create scenes that wouldn’t be possible in real life.
How to Edit:
- Layering Elements: Import different images or parts of images into a single file. Use masking and selection tools to integrate the elements seamlessly seamlessly.
- Blending and Matching Colors: Ensure that the colors, lighting, and shadows of the different images match to create a unified composition. You can use color grading or adjustment layers to fine-tune this.
Tip: Composite editing is excellent for creating surreal, fantasy, or conceptual images. To make the final composition appear realistic, make sure the lighting and shadows are consistent across all layers.
Popular, stylish photo
Popular Stylish Photo Trends refer to photography and editing techniques that are widely admired for their visual appeal and creativity. These styles often evolve with current trends in photography, art, and design, combining popular aesthetics with technical expertise. Below are some of the most popular stylish photo trends:
Minimalist Photography
Description: Focuses on simplicity, using clean lines, negative space, and few elements in the frame.
- Popular In: Product photography, portraits, and nature photography.
- Why It’s Stylish: Less is more; it emphasizes the subject, creating a striking visual impact.
Vintage/Retro Style
Description: Uses filters and color grading to give photos a nostalgic, old-school feel, reminiscent of film photography from the ’70s or ’80s.
- Popular In: Fashion, lifestyle, and travel photography.
- Why It’s Stylish: The warm tones and film grain effect evoke a sense of nostalgia and timelessness.
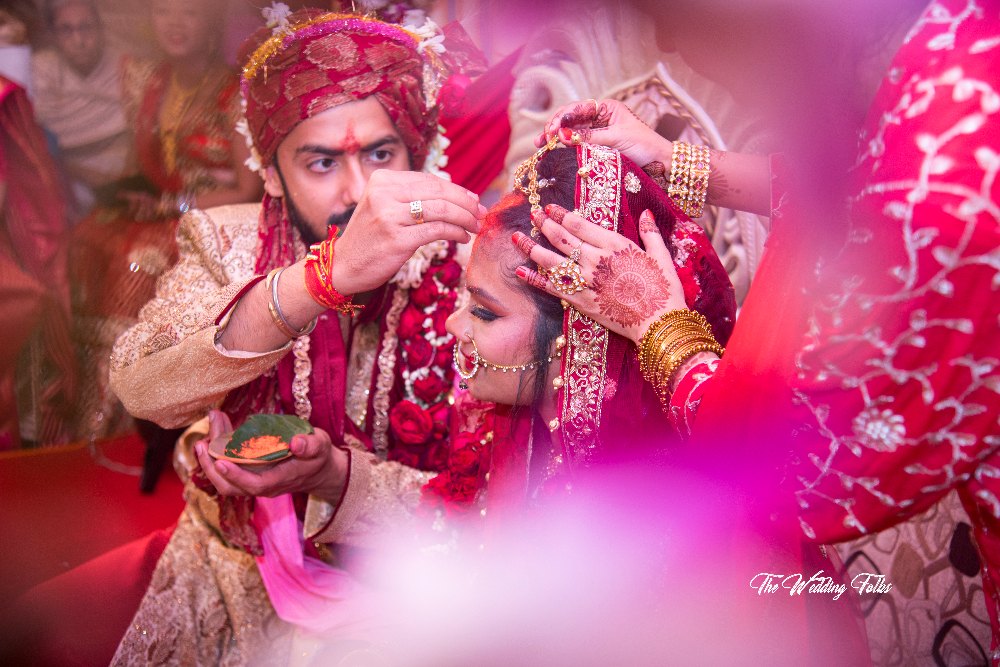
Light and Airy Photography
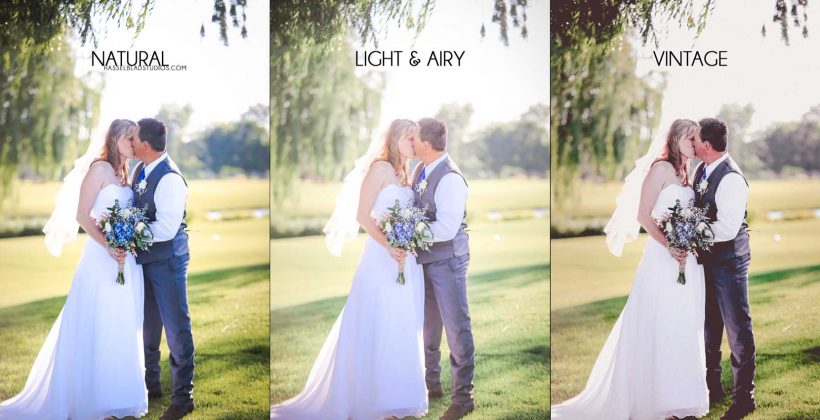
Description: Features bright, soft lighting with light pastel tones and a clean, airy feel.
- Popular In: Wedding photography, lifestyle, and portrait photography.
- Why It’s Stylish: It creates a dreamy, ethereal atmosphere, giving the images a soft, romantic feel.
Dark and Moody Photography

Description: Involves low-key lighting, deep shadows, and rich, dark tones.
- Popular In: Portraits, fashion, and urban photography.
- Why It’s Stylish: Creates dramatic, powerful imagery that evokes emotion and a sense of mystery.
HDR (High Dynamic Range) Photography
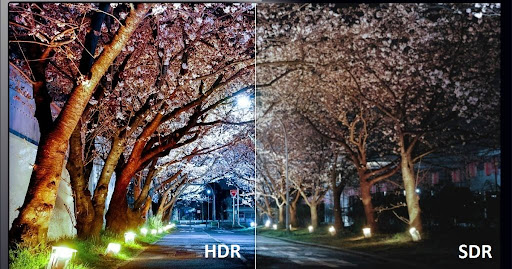
Description: Enhances the contrast and details in photos, making them vivid and vibrant.
- Popular In: Landscape, architecture, and travel photography.
- Why It’s Stylish: The increased detail and vibrant colors make the photo appear highly dynamic and immersive.
Bokeh Effect
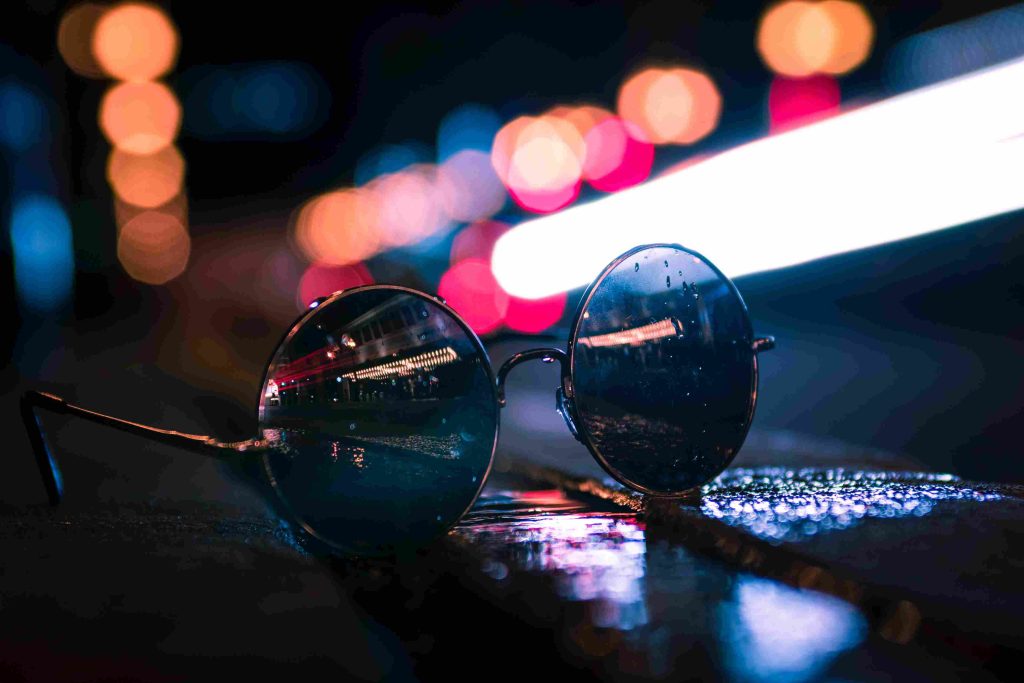
Description: A photography technique where the background is blurred to create a soft, circular effect, highlighting the subject in sharp focus.
- Popular In: Portraits, product photography, and macro shots.
- Why It’s Stylish: It isolates the subject, making it stand out against a visually soft and pleasing background.
Black and White Photography

Description: Classic photography that removes color and focuses on contrast, texture, and composition.
- Popular In: Street photography, portraiture, and fine art photography.
- Why It’s Stylish: The lack of color emphasizes form, emotion, and texture, creating timeless and dramatic imagery.
Cinematic Photography
Description: Inspired by film and television, this style often involves wide shots, dramatic lighting, and a sense of storytelling.
- Popular In: Fashion, editorial, and lifestyle photography.
- Why It’s Stylish: It transforms everyday moments into cinematic, dramatic scenes that captivate viewers.
Surreal Photography
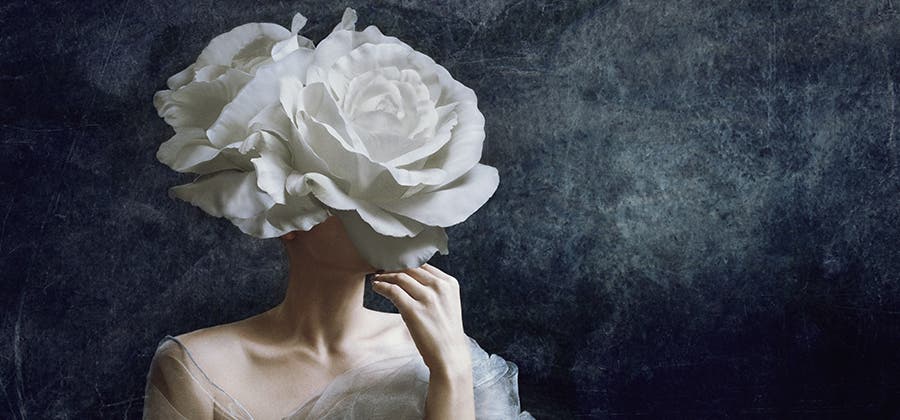
Description: Combines unusual, dreamlike elements in post-processing to create fantasy-like scenes.
- Popular In: Conceptual and fine art photography.
- Why It’s Stylish: It pushes creative boundaries and engages viewers with imaginative, thought-provoking imagery.
Double Exposure Photography
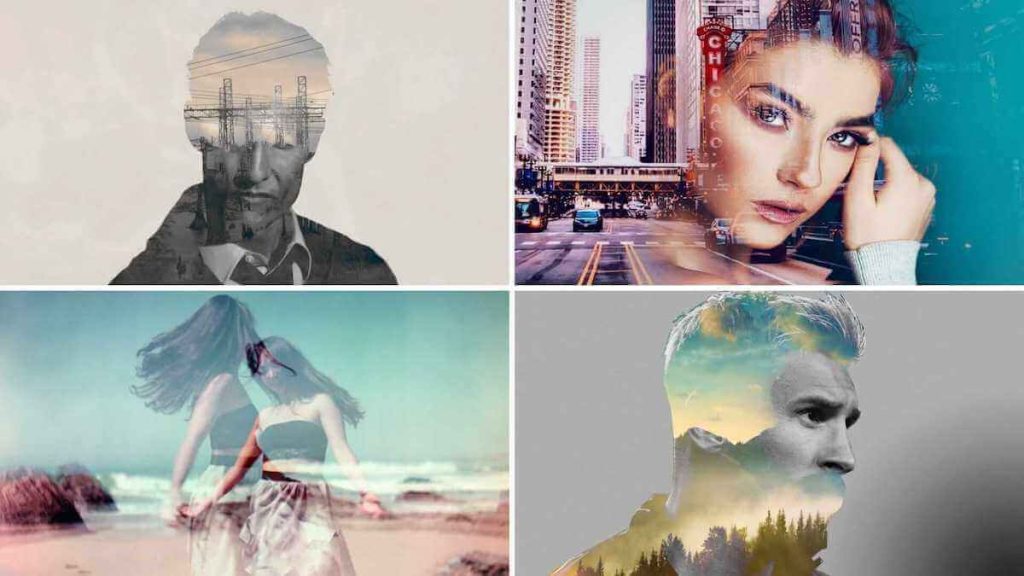
Description: Involves combining two images into a single frame to create unique and artistic effects.
- Popular In: Portraits, fashion, and conceptual photography.
- Why It’s Stylish: It blends the real and surreal, offering a visual metaphor and creating striking, layered images.
How to Edit for Different Platforms and Uses
When editing photos, it’s essential to tailor your final product to the platform or use case where it will be displayed. Different platforms have unique requirements in terms of image dimensions, aspect ratios, color schemes, and file types. Editing for these platforms ensures that your images look their best across all devices, whether they are being shared on social media, used in print, or displayed on a website. Below, we’ll break down how to edit for various platforms and uses, ensuring your photos are optimized for each one.
Editing for Social Media
Social media platforms like Instagram, Facebook, Twitter, and Pinterest each have their specifications for image size, aspect ratio, and visual appeal. Here’s how to optimize your photos for these platforms:
Instagram:
- Aspect Ratio: Instagram supports square (1:1), portrait (4:5), and landscape (1.91:1) aspect ratios.
- Optimal Size: For the best quality, aim for 1080px by 1080px for square posts, 1080px by 1350px for portrait, and 1080px by 608px for landscape.
- Tips: Use a consistent color scheme to create a cohesive feed. Bright, vibrant photos work well on Instagram, and applying filters can help maintain your aesthetic.
Facebook:
- Aspect Ratio: Facebook supports landscape (16:9), square (1:1), and portrait (4:5) images.
- Optimal Size: The recommended size for images is 1200px by 630px for shared posts and 1200px by 1200px for ads.
- Tips: Focus on high-contrast images with precise subjects. Facebook images tend to perform better when they are attention-grabbing and easy to read, especially in News Feeds.
Twitter:
- Aspect Ratio: Twitter displays images in landscape (16:9) or square (1:1) formats.
- Optimal Size: The ideal image size for Twitter is 1200px by 675px for landscape images and 1080px by 1080px for square photos.
- Tips: For maximum engagement, use images that complement your tweet’s content and keep text minimal. High-quality visuals that convey your message quickly are key on Twitter.
Pinterest:
- Aspect Ratio: Pinterest images typically do best in a vertical format (2:3 ratio).
- Optimal Size: The best image size is 1000px by 1500px.
- Tips: Pinterest is a highly visual platform, so create images that are visually striking, easy to read, and designed to stand out in users’ feeds. Include text overlays for added context.
General Social Media Tips:
- Optimize for Mobile: Most social media users are on mobile devices, so ensure your images are clear and impactful, even on smaller screens.
- Keep File Size in Mind: While high-quality photos are essential, ensure your image file sizes are small enough for fast loading. Compress your images without losing quality.
- Maintain Brand Consistency: Apply consistent filters, color schemes, and fonts to maintain a cohesive and professional look across all social media channels.
Editing for Websites and Blogs
When editing photos for a website or blog, you need to consider the user experience, load times, and overall aesthetic of the site. Your images should be high quality yet optimized for fast loading speeds.
Optimal Size:
- Hero Images: For large header images, aim for 1920px by 1080px for full-screen resolution.
- Blog Posts: For blog images, a size of 1200px by 800px is often ideal.
File Format:
- JPEG: Ideal for most images as it offers a good balance between quality and file size.
- PNG: Best for images with transparency, logos, or when you need high detail.
- WebP: This format provides excellent compression without compromising quality and is supported by most modern browsers.
Tips:
- SEO Optimization: Don’t forget to optimize image file names, alt text, and descriptions to improve your website’s SEO.
- Responsive Design: Ensure your images resize appropriately on different devices. Use tools like Adobe Lightroom or Photoshop’s export settings to generate multiple sizes for responsive designs.
- Image Compression: Use online tools (like TinyPNG or ImageOptim) to compress your images without sacrificing quality, ensuring faster page loading times.
Top Photo Editing Software for Beginners and Experts
Whether you’re just starting your photo editing journey or you’re a seasoned professional, choosing the right software is essential to achieving your desired results. From basic touch-ups to intricate, high-end edits, the right photo editing tool can make all the difference. Here’s a breakdown of some of the top photo editing software options available, catering to both beginners and experts.
Adobe Photoshop: The Gold Standard for Professionals
Best For: Advanced users, professionals, photographers, and graphic designers
Adobe Photoshop is the industry-standard photo editing software widely known for its comprehensive set of features and tools. While it has a steep learning curve for beginners, it provides unparalleled capabilities for those who are ready to master it.
- Key Features include layers, masking, retouching, advanced color correction, blending modes, brushes, 3D editing, and more.
- Pros: Photoshop offers infinite creative possibilities, from basic edits to complex compositions. Its versatility makes it suitable for all types of visual projects, including photography, design, and digital art.
- Cons: Expensive monthly subscription fee; steep learning curve for newcomers.
- Ideal For: Photographers, graphic designers, digital artists, and advanced photo editors.
Lightroom: Professional Editing with Simplicity
Best For: Photographers (both beginners and experts)
Adobe Lightroom is a user-friendly, powerful photo editing software that focuses more on enhancing images rather than creating designs from scratch. It’s perfect for photographers who need to process large numbers of pictures with professional-level adjustments. Lightroom is also known for its non-destructive editing capabilities, meaning you can make changes to your photos without permanently altering the original.
- Key Features: Non-destructive editing, presets, color grading, sharpening, noise reduction, and batch processing.
- Pros: Its streamlined workflow is ideal for photo organization and editing large batches of images. It also offers robust raw file editing, which is crucial for professional photographers.
- Cons: are that it is not as versatile as Photoshop for advanced manipulation and has limited graphic design features.
- Ideal For: Photographers, influencers, and hobbyists who focus on enhancing their photos without overcomplicating the process.
GIMP (GNU Image Manipulation Program): The Free Alternative
Best For: Beginners on a budget, open-source enthusiasts, and hobbyists
GIMP is an open-source, free photo editing software that offers many of the features available in Photoshop. While it lacks the polish and refined interface of paid options, it’s an excellent choice for beginners who are just getting into photo editing and don’t want to invest in expensive software yet.
- Key Features include layers, customizable brushes, masks, filters, advanced selection tools, and support for various file types.
- Pros: Completely free; offers a wide range of professional-grade tools and features; highly customizable with plugins and scripts.
- Cons: Slightly clunky interface; less intuitive than paid alternatives like Photoshop or Lightroom.
- Ideal For: Budget-conscious users, hobbyists, and those who prefer open-source tools.
Affinity Photo: The Affordable Photoshop Alternative
Best For: Intermediate to advanced users looking for a one-time payment option
Affinity Photo has emerged as a popular alternative to Photoshop, offering a robust set of editing tools at a fraction of the cost. It’s an ideal choice for both beginners and advanced users who want the power of Photoshop without the recurring subscription fees.
- Key Features include layers, live filters, retouching tools, advanced masking, HDR editing, and panorama stitching.
- Pros: One-time purchase; great for advanced editing tasks; smooth and intuitive interface.
- Cons: Lacks some of the cloud-based integrations and high-level features found in Adobe’s Creative Cloud Suite.
- Ideal For: Intermediate to advanced photo editors, hobbyists, and professionals looking for a powerful, affordable alternative to Photoshop.
Canva: Easy Editing for Social Media and Graphic Design
Best For: Beginners and social media influencers
Canva is a popular choice for beginners and those who need quick, stylish edits without diving deep into complex photo editing software. It’s particularly favored by users who want to create visually appealing content for social media, blogs, or marketing materials. Canva offers an intuitive drag-and-drop interface and plenty of ready-made templates.
- Key Features: Templates for social media posts, graphics, infographics, and flyers; filters, text overlay, and simple photo adjustments.
- Pros: Extremely user-friendly; extensive library of templates and design elements; cloud-based for easy access and collaboration.
- Cons: Limited photo manipulation tools compared to professional software; not ideal for advanced edits.
- Ideal For: Social media managers, marketers, small business owners, and beginners who want quick, stylish edits.
Snapseed: Powerful Mobile Editing for On-the-Go Creativity
Best For: Mobile photographers and social media content creators
Snapseed is a free, mobile-based photo editing app developed by Google, which is widely loved for its robust set of editing tools. It’s designed for those who want high-quality editing capabilities on their smartphones, making it an excellent option for social media influencers or anyone looking to edit photos quickly while on the go.
- Key Features include precision masking, filters, exposure adjustments, lens blur, a healing tool, and tilt-shift effects.
- Pros: Free and mobile-friendly; intuitive interface; powerful editing tools for a mobile app.
- Cons: Limited compared to desktop software; can be challenging to use for more complex edits.
- Ideal For: Mobile photographers, social media influencers, and users who need quick edits on their phones.
Conclusion:
Creating stylish photos is an art that blends creativity, technical skill, and personal expression. Whether you’re a beginner or an experienced photographer, focusing on critical elements such as composition, lighting, color grading, and post-processing can elevate your images and give them a polished, visually appealing look. Stylish photos are not just about following trends—they are about telling a story, evoking emotions, and capturing moments in a way that resonates with viewers.
With practice, you can develop your unique style and apply these techniques to any photo you capture. Experiment with different editing tools and approaches, embrace the beauty of simplicity or boldness, and never hesitate to push your creative boundaries. Ultimately, a stylish photo speaks to its viewer and leaves a lasting impression, showcasing your artistic vision and photographic skill. So, go ahead, explore, and let your creativity shine through your photos.