

Snapseed has become one of the most popular mobile photo-editing apps, beloved by amateur and professional photographers alike for its powerful features and user-friendly design. Among its many tools, the app allows users to import and apply unique filters through QR codes, making it possible to recreate specific looks quickly and consistently. This guide will focus on one of the most sought-after aesthetics: the blue and brown look.
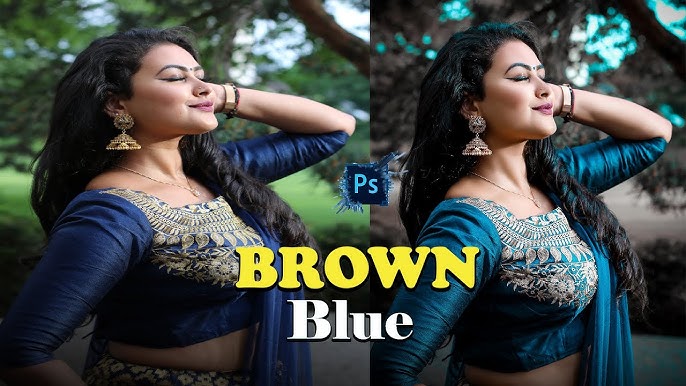
The blue and brown filter adds a dramatic, moody tone to photos, giving them a vintage, film-inspired vibe. With just a scan of a QR code, you can transform your images to have a balanced blend of cool blues and warm browns, perfect for portraits, nature shots, and urban photography. In this guide, we’ll walk you through each step of finding, importing, and using QR codes in Snapseed to achieve this captivating effect.
Understanding Snapseed and QR Codes for Filters
Snapseed, developed by Google, is a free photo-editing app that combines professional-grade tools with an intuitive, user-friendly interface. With a range of powerful editing features, from basic adjustments to advanced tools like selective editing, Snapseed has become a go-to app for mobile photographers who want to enhance their images. One of its unique capabilities is the ability to use QR codes to apply specific filter settings instantly.
What Are QR Code Filters in Snapseed?
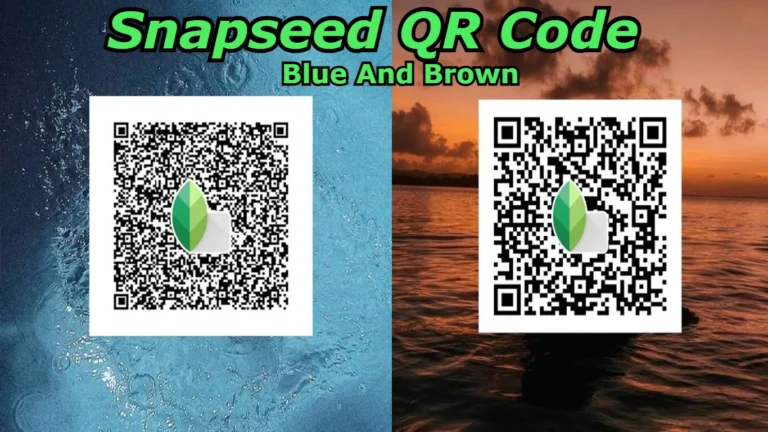
QR codes are not just for sharing links or contact information; they also play a unique role in Snapseed by allowing users to share and apply custom filter settings. These QR codes contain specific editing parameters—such as color balance, saturation, and brightness settings—that can be scanned and applied directly to your images. This makes it easy to replicate and share complex edits with others, saving you time and effort.
Using QR codes in Snapseed is particularly popular among influencers, photographers, and content creators who want a consistent aesthetic across their images. By scanning a QR code, you can instantly apply a detailed filter without needing to manually adjust each setting. This can be especially useful for trending aesthetics like the blue and brown look, where a combination of tones and adjustments creates the final effect.
Finding the Perfect Blue and Brown QR Code Filter
Applying a blue and brown aesthetic in Snapseed can give your photos a rich, moody tone that’s perfect for creating a vintage, cinematic vibe. However, finding the ideal blue and brown QR code filter to achieve this look is crucial. Fortunately, several online communities and resources offer an abundance of Snapseed QR code filters to explore, and choosing the right one can make a huge difference in your final edit.
Popular Sources for Blue and Brown QR Code Filters
To get started, here are some popular platforms where you can find high-quality QR codes specifically for Snapseed:
Instagram and Pinterest
- Many photographers and content creators share their unique Snapseed QR codes on social media. Searching hashtags like #SnapseedFilter, #SnapseedQR, or #BlueBrownFilter can lead you to a variety of options. Pinterest also often has collections of curated QR codes that you can easily save and try.
Snapseed Enthusiast Groups on Facebook
- Facebook has several groups dedicated to Snapseed enthusiasts who regularly share their QR code creations. Joining a group allows you to ask for recommendations, browse shared filters, and even get tips from seasoned users on perfecting the blue and brown look.
Online Photography Communities and Forums
- Websites like Reddit, particularly the r/Snapseed and r/photography subreddits, have users who post unique QR codes. These communities are helpful for finding filters that have been tested and refined by other photo editors.
Dedicated Websites and Blogs
- Some websites and photography blogs curate lists of QR codes for Snapseed, often organized by aesthetic. Sites like Snapseedfilter.com or photography-focused blogs provide QR codes for various looks, including blue and brown tones, and offer tips on achieving the best results.
Popular Blue And Brown QR Codes for Snapseed:
The blue and brown aesthetic is highly sought after for its ability to evoke a vintage, cinematic, or even moody vibe in photos. While Snapseed doesn’t have a native gallery for pre-made filters, QR codes allow users to easily import and apply custom edits that achieve the desired look. Below are some of the most popular and highly recommended blue and brown QR code filters that can transform your photos into stunning, cohesive works of art.
Cinematic Blue and Brown Filter
This filter combines deep blues with warm, earthy browns to create a cinematic effect. It is perfect for enhancing landscapes, urban shots, or portraits. The strong contrast between cool and warm tones brings out rich details in the shadows while giving the image a moody, dramatic look.
- Where to Find It: This filter can be found on platforms like Pinterest and Instagram under hashtags like #SnapseedCinematic or #CinematicBlueBrownFilter.
- Ideal For: Urban and nature photography, portraits with a touch of drama, and evening or dusk shots.
Key Features:
- Slight vignette for added focus
- Strong shadow enhancement
- Muted skin tones with a cool undertone
Vintage Blue and Brown Filter
If you’re looking for a nostalgic, retro feel, the vintage blue and brown QR code filter is a great choice. This filter typically adds a faded blue tone to highlights and a warm brown or sepia tint to shadows, mimicking the look of old film photos. It’s perfect for bringing a sense of timelessness to your photos.
- Where to Find It: Commonly shared in Snapseed enthusiast groups on Facebook and Reddit’s r/Snapseed.
- Ideal For: Travel photos, portrait photography, and nostalgic edits.
Key Features:
- Soft contrast and muted colors
- Classic film grain effect
- Slight color desaturation for an aged look
Pastel Blue and Brown Filter
For those who prefer a softer, more subtle approach, the pastel blue and brown filter provides a light, airy vibe without overpowering the photo. This filter lightly desaturates the colors and applies a pastel tone, creating a dreamy look that’s perfect for lifestyle or nature photography.

- Where to Find It: Search for pastel blue-brown filters on Pinterest, Instagram, or Snapseed blogs.
- Ideal For: Light, airy outdoor portraits, minimalist photography, and delicate nature shots.
Key Features:
- Light exposure adjustments
- Soft, muted colors with subtle contrast
- Warm brown highlights with cool blue shadows
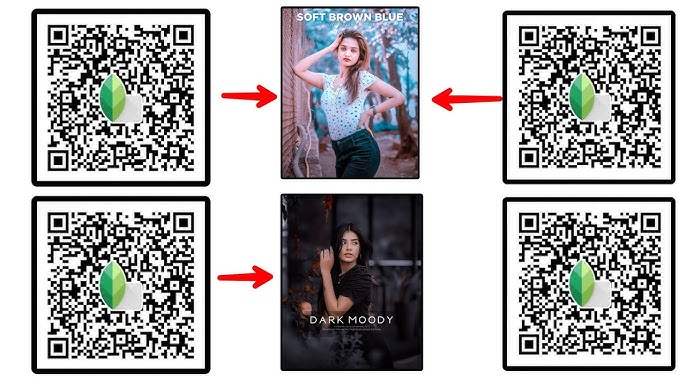
Dark Moody Blue and Brown Filter
This filter emphasizes cool blue tones in the highlights and deep, rich browns in the shadows, creating a brooding, intense atmosphere. It is for those looking to add a darker, moodier tone to their photos.
- Where to Find It: This is popular among photographers who specialize in dramatic, edgy photography and is often shared in online photography communities.
- Ideal For: Moody portrait photography, dark urban shots, and low-light environments.
Key Features:
- High contrast and deep shadows
- Cool, icy blue tones to balance the warmth of the browns
- Increased saturation for a bolder effect
Golden Hour Blue and Brown Filter
Inspired by the soft, warm tones found during golden hour, this filter combines gentle brown tones that mimic the warmth of natural light with cool blue hues to balance the photo. It’s perfect for capturing the warmth of the sun while adding depth and contrast.

- Where to Find It: Check photography websites or Snapseed sharing communities for golden hour-inspired filters.
- Ideal For: Sunset and sunrise shots, portraits with soft lighting, and beach photography.
Key Features:
- Soft blue tones in the shadows
- Warm, golden brown highlights
- Natural-looking color balance
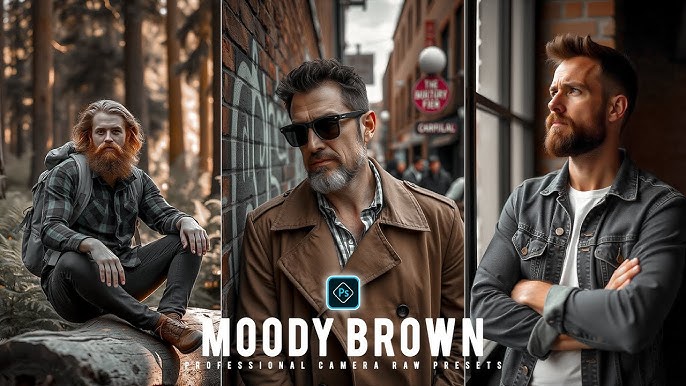
Moody Film Blue and Brown Filter
This filter gives your photos a slight “film” look, evoking a sense of nostalgia and moodiness. The blue tones help enhance the cooler areas of your image, while the brown highlights create a vintage feel. It’s perfect for anyone who loves the look of old-school film photography.
- Where to Find It: Often shared by photographers on Instagram and Tumblr, who specialize in moody, film-inspired images.
- Ideal For: Creative or artistic portraits, urban shots, and atmospheric photography.
Key Features:
- Soft, muted tones and increased grain
- High contrast between blue and brown hues
- A faded, slightly washed-out effect for added mood
Step-by-Step Guide to Applying a QR Code in Snapseed
Snapseed’s powerful editing tools allow you to enhance your photos with ease, but one of its most popular features is the ability to apply custom edits using QR codes. QR codes in Snapseed are pre-set filters or adjustments that can instantly transform your image. In this guide, we’ll walk you through the process of applying a QR code in Snapseed, making it easier than ever to enhance your photos with just a few simple steps.
What You’ll Need
- Snapseed App: Ensure you have Snapseed installed on your device (available for both iOS and Android).
- QR Code Image: A QR code image that contains the specific Snapseed filter or edit you want to apply.
- Internet Connection: Required to download or share QR codes.
Step 1: Open Your Image in Snapseed
- Launch the Snapseed App
Open the Snapseed app on your smartphone or tablet. - Select the Photo to Edit
Once in the Snapseed app, tap on the “+” or “Open” button, typically located at the center or bottom of the screen. Choose the photo you want to edit from your gallery or camera roll.
Step 2: Access the QR Code Option
- Navigate to the “Tools” Section
After your photo is open, tap on the “Tools” option at the bottom of the screen. Here, you’ll find a range of editing options, such as “Tune Image,” “Details,” and others. - Locate the “QR Code” Option
Scroll down within the Tools menu until you see the “QR Code” option. If you don’t see it, make sure your Snapseed app is updated to the latest version.
Step 3: Scan the QR Code
- Tap on “QR Code”
After selecting the “QR Code” tool, a camera viewfinder will appear, prompting you to scan the QR code. - Scan the QR Code
Hold your device over the QR code image that you wish to apply. The Snapseed app will automatically recognize the QR code and apply the corresponding filter or preset adjustments to your photo. Ensure that the code is clear and not blurry for accurate scanning.
Step 4: Apply the Adjustments
- Adjust the Filter (Optional)
Once the QR code is scanned and the preset is applied, you can fine-tune the effect further. Tap on the sliders to adjust brightness, contrast, saturation, and more. - Preview Your Changes
Take a moment to preview the changes and see how the filter enhances your image. Snapseed provides a split-screen view so you can compare the before and after versions of your photo to ensure you’re happy with the result.
Step 5: Save or Export Your Edited Image
- Save the Image
If you’re satisfied with the results, tap the checkmark in the lower right corner to apply the changes permanently. - Export Your Photo
To save your edited image, tap on “Export” (usually located in the upper-right corner) and select your preferred saving or sharing option. You can save the photo to your device, share it directly to social media, or even export it to other apps.
Step 6: Share the QR Code (Optional)
If you want to share the same edit with friends or colleagues, you can share the QR code. Here’s how:
- Share the QR Code Image
You can find the QR code image on websites, social media, or photography forums. Once you’ve downloaded a QR code, you can share it with others by sending them a picture. They can apply it using the same method outlined above. - Save the QR Code for Future Use
If you plan to use the same QR code in the future, save the image to a specific folder on your phone or tablet for easy access.
Fine-Tuning the Blue and Brown Effect for Different Photos
The blue and brown color scheme in photo editing is famous for creating a timeless, cinematic, and mood-driven look. While applying a QR code in Snapseed can give you a great starting point, it’s important to fine-tune the effect to suit your photo. Whether you’re editing landscapes, portraits, or urban shots, adjusting the blue and brown tones for different types of images can yield stunning and unique results. In this section, we’ll guide you through fine-tuning the blue and brown effect in Snapseed, optimizing it for various photo styles.
Blue and Brown Effect for Portraits
Portraits often require a delicate balance between warm and cool tones to highlight skin tones while adding mood or depth to the image. The blue and brown filter can create a cinematic or vintage look, but fine-tuning it is critical to ensuring the subject looks natural and flattering.
Steps to Fine-Tune for Portraits:
- Adjusting Skin Tones:
- Warmth: Blue tones in the shadows can create a cool undertone in the background or clothing, but it may make skin appear unnatural. Use Snapseed’s Tune Image tool to adjust Warmth and ensure the skin retains its natural warmth while the background maintains its cool blue hue.
- Saturation: To keep skin tones realistic, reduce the Saturation slightly to prevent over-saturation, which can make skin look unnaturally vibrant.
- Vignette:
- Apply a Vignette to draw attention to the subject by darkening the corners of the image. This works well with the moody contrast of blue and brown, keeping the focus on the face or upper body.
- Details and Structure:
- For portraits, fine-tune the Structure to enhance skin texture without making it overly sharp. Adjusting the Sharpening slightly can help retain the skin’s softness while enhancing the finer details.
- Contrast and Brightness:
- Use Contrast to make the blue and brown tones pop in the image, but be mindful not to make the image too harsh. Brightness should be adjusted based on lighting conditions to ensure that the face isn’t overexposed or too dark.
Blue and Brown Effect for Landscapes
Landscapes, particularly those captured during golden hour, benefit from the blue and brown filter to enhance the rich details of nature. By fine-tuning this effect, you can emphasize the color of the sky, improve the earth tones, and bring out the mood of the environment.
Steps to Fine-Tune for Landscapes:
- Sky and Background:
- Increase the Blue Tones: If your landscape features a clear sky, increase the blue tones by adjusting the Shadows and Highlights settings in the Tune Image tool. This will help give the sky a deeper, more dramatic look.
- Adjust the Warmth: If you’re photographing a sunset or sunrise, enhance the Brown tones in the highlights to replicate the golden-hour glow. Fine-tuning the Warmth will allow you to adjust the level of warmth and ensure it matches the natural ambiance.
- Contrast and Saturation:
- Boosting the Contrast will make the colors pop, particularly in the foreground, which can help define the landscape. The Saturation can be increased slightly, but be careful not to overdo it; the natural hues should remain faithful.
- Details and Structure:
- The structure can help bring out the textures in elements like trees, mountains, or water. Adjusting the details will also help make the landscape appear sharp and detailed while maintaining a smooth feel.
- Lens Blur:
- Apply a slight Lens Blur to the background or the edges of the photo to focus more on specific elements of the landscape, such as the foreground or subject, while giving the image a professional, editorial feel.
Blue and Brown Effect for Urban Photography
Urban photography is all about capturing the energy and texture of a cityscape. The blue and brown color scheme works well for grungy, industrial, or city-based shots, providing a relaxed, vintage, or cinematic vibe. Fine-tuning the blue and brown effect can highlight architectural features, textures, and urban energy.
Steps to Fine-Tune for Urban Photography:
- Enhancing Textures and Shadows:
- Increase the Structure and Sharpness slightly to bring out the textures in buildings, streets, and other architectural elements. This will give your photo more detail and depth while keeping the cityscape sharp.
- Increase Shadows to make the darker parts of the photo more pronounced, giving the image a gritty, edgy feel.
- Adjusting Contrast:
- Urban photography often benefits from high contrast, which makes the difference between the blue and brown tones more striking. Adjust the Contrast settings to ensure the blues in the sky or shadows and the warm browns in the architecture stand out.
- Boosting the Vibe:
- Apply a Vignette to darken the edges, which will help draw attention toward the center of the photo. This is particularly useful if there’s a subject or focal point in the middle of the city scene.
- Use the Grain tool subtly to add a gritty, film-like texture, which is often desirable in urban photography.
- Adding Warmth for Tones:
- A warmth adjustment can add a bit of brown to the highlights, making the city or streetlights stand out. A touch of warmth can also bring life to an otherwise cool and desolate urban scene.
Benefits of Using QR Codes for Editing in Snapseed
- Quick and Easy Application: Custom filters can be applied instantly without manual adjustments.
- Consistency Across Photos: Maintain a uniform look for multiple images, ensuring professional results.
- Access to Advanced Styles: Use expert-created presets for unique and complex editing effects.
- Simple Sharing of Styles: Easily share QR codes with others to replicate your edits.
- Encourages Creativity: Experiment with different looks quickly without fear of making irreversible changes.
- User-Friendly for All Levels: Suitable for both beginners and professionals.
- Customizable for Different Photos: Apply QR codes tailored to specific photo types (e.g., portraits, landscapes).
- Save Presets for Future Use: Store your favorite QR codes for easy application on future photos.
- Seamless Integration with Other Features: Combine QR code presets with Snapseed’s manual editing tools.
- Perfect for Social Media: Ensure consistency and a visually appealing aesthetic across all posts.
Frequently Asked Questions (FAQ)
What are Snapseed QR codes?
Snapseed QR codes are scannable codes that contain preset filter settings for Snapseed. These codes allow you to apply custom photo edits, such as specific color grading or filters, instantly without manually adjusting each setting.
How do I use a Snapseed QR code for editing?
To use a Snapseed QR code:
- Open the Snapseed app and select a photo.
- Tap the “Tools” icon and choose “QR Code.”
- Scan the QR code you want to apply, and the preset edits will be applied automatically to your photo.
Where can I find QR codes for the blue and brown look?
QR codes for a blue and brown look can be found on social media platforms, photography forums, or websites that share Snapseed presets. Many photographers and content creators share their custom filters with the community for free or for purchase.
Can I customize the blue and brown look after applying the QR code?
Yes! After scanning and applying a QR code, you can still fine-tune the edits. Snapseed allows you to make further adjustments, such as exposure, sharpness, or saturation, to perfect the look.
Are QR codes available for other color schemes besides blue and brown?
Yes, QR codes are available for a wide variety of color schemes and photo styles. You can find codes for vintage looks, cinematic styles, high contrast, and more. The QR code community regularly shares new and unique presets.
Can I share my own Snapseed QR code with others?
Yes, you can share your custom QR code by exporting the filter you’ve created. Once saved, you can generate a QR code and share it with others, allowing them to apply your custom filter to their photos.
Conclusion
Using Snapseed QR codes to apply a blue and brown look offers a streamlined, creative way to enhance your photos with a professional touch. By leveraging these QR codes, you can save time while achieving a consistent, visually appealing style across your images. Whether you’re looking to add a subtle color grading effect or completely transform the mood of your photo, QR codes make editing quicker and more efficient. They also allow for creative experimentation without the risk of over-editing or making irreversible changes to your images. Additionally, QR codes can be shared with others, allowing for collaboration or the replication of successful editing styles.
Incorporating QR codes into your Snapseed workflow is an intelligent way to harness the power of custom presets, which gives you flexibility, consistency, and ease in your photo editing. Whether you are a beginner exploring Snapseed or a professional seeking time-saving methods, QR codes make photo editing more accessible and enjoyable.