
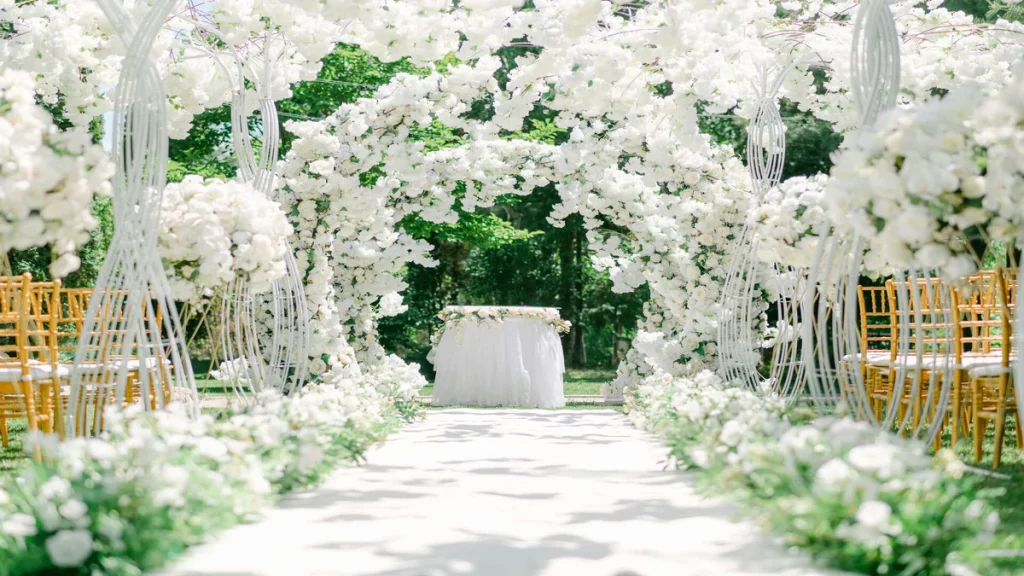
Weddings are one of the most cherished events in a person’s life. From the stunning venues and emotional vows to the first kiss and unforgettable dances, every moment is packed with memories. Capturing these moments through photographs ensures that couples can relive their special day for years to come. However, wedding photos often need a little extra touch to truly highlight their beauty and emotion. This is where wedding photo editing comes into play.
In this comprehensive guide, we’ll walk you through the step-by-step process of editing wedding photos. Whether you’re a professional photographer or a couple looking to enhance your wedding pictures, these tips will help you create beautiful, timeless images.
Why Wedding Photo Editing Is Important
Wedding photo editing allows you to enhance the quality of your images, bringing out the best in every shot. Editing is not about drastically changing the image but about making subtle adjustments that improve the overall look and feel. The main benefits of wedding photo editing include:
- Correcting Lighting and Exposure: Many wedding photos are taken in varying lighting conditions, which can sometimes result in underexposed or overexposed images. Editing helps adjust these issues, ensuring your photos are balanced and well-lit.
- Enhancing Colors: Editing can make colors pop, creating a vibrant and engaging image. Whether it’s making the bride’s dress look pure white or enhancing the colors of the flowers, editing brings out the beauty of every detail.
- Retouching Imperfections: Minor imperfections like blemishes, stray hairs, or distractions in the background can detract from an image’s overall beauty. Editing can remove or minimize these imperfections while maintaining the authenticity of the moment.
- Creating a Consistent Style: Many photographers develop their editing style to make their work instantly recognizable. Wedding photo editing helps create a consistent look throughout the entire album, which can reflect the couple’s unique style.
- Preserving Emotion and Authenticity: A good edit enhances a photo’s emotion without diminishing its authenticity. Subtle adjustments ensure the photo still looks natural but with more impact.
Now that we understand the importance of editing wedding photos let’s explore a step-by-step guide to help you create stunning memories.
Tools You Need for Wedding Photo Editing
When it comes to wedding photo editing, the right tools can make all the difference in creating stunning images that will last a lifetime. Whether you’re a professional photographer or an enthusiast looking to enhance your wedding photos, understanding the tools available can help you achieve the best results. Here’s a breakdown of essential tools you’ll need for wedding photo editing:
Adobe Lightroom: The Industry Standard for Photo Editing
Adobe Lightroom is one of the most popular tools for wedding photo editing. It’s designed specifically for photographers and offers powerful tools for color correction, exposure adjustments, and batch processing.
- Key Features:
- Non-destructive Editing: This makes it easy to experiment with edits without losing the original image quality.
- Presets: Quickly apply creative styles, or look presets, ideal for creating a consistent editing style across an entire wedding album.
- RAW File Support: Lightroom excels at handling RAW images, which is crucial for wedding photographers who capture high-quality images for editing flexibility.
- Batch Processing: Efficiently apply the same settings to multiple photos, saving time in large wedding shoots.
Adobe Photoshop: Perfect for Detailed Edits
Adobe Photoshop is the go-to tool for more advanced, detailed photo editing, such as skin retouching, removing unwanted objects, or adding artistic elements to a wedding photo.
- Key Features:
- Layered Editing: Allows you to work on specific aspects of an image, such as the background or skin tones, without affecting other areas.
- Retouching Tools: Ideal for removing blemishes, smoothing skin, or fine-tuning facial features.
- Cloning and Healing Brushes: Remove distractions like photobombers or unwanted objects from wedding photos.
- Advanced Color Grading: Achieve professional-level color correction and grading to enhance the atmosphere of wedding photos.
Free Photo Editing Tools
For photographers or couples on a budget, free photo editing tools can still provide excellent results without the need for expensive software.
GIMP (GNU Image Manipulation Program): A free, open-source alternative to Photoshop, GIMP offers advanced editing capabilities for wedding photographers who are just starting or need to keep costs low.
- Key Features: Similar to Photoshop, GIMP supports layers, masks, filters, and custom brushes, making it ideal for detailed photo editing.
Canva: While primarily a design tool, Canva offers easy-to-use wedding photo editing features such as filters, text overlays, and basic color adjustments. It is perfect for creating wedding albums or social media posts.
- Key Features: Pre-made templates, simple interface, and ease of use.
Mobile Apps for Wedding Photo Editing
Wedding photographers who need to edit on the go or couples looking to tweak their photos quickly can use mobile apps for efficient, high-quality photo editing.
Snapseed: A comprehensive mobile app with features similar to Lightroom and Photoshop. Snapseed offers powerful tools for color correction, skin smoothing, and detail enhancement, all within a user-friendly interface.
- Key Features: Curves, selective adjustments, healing tools, and various filters.
VSCO: Known for its minimalistic approach and high-quality filters, VSCO is perfect for couples who want to quickly edit and share their wedding photos on social media.
- Key Features: Customizable filters, preset styles, and easy sharing options.
Facetune: Specially designed for portrait editing, Facetune is excellent for enhancing bridal portraits, smoothing skin, and adjusting facial features.
- Key Features: Skin retouching, teeth whitening, and blemish removal.
A Step-by-Step Guide to Wedding Photo Editing
Step 1: Organizing and Selecting Your Photos
Before you even start editing, you need to go through all the photos and select the ones you want to work on. Most weddings generate hundreds or even thousands of images, so organizing them is crucial.
Tips for Organizing Your Photos:
- Separate by Categories: Organize your images into categories, such as ceremony, reception, candid shots, portraits, and details. This will help you quickly find specific photos when you start editing.
- Backup Your Photos: Always back up your images before editing. Use cloud storage or external hard drives to keep your files safe.
- Select Your Best Shots: Review all your images carefully and select the ones that best capture the emotion, composition, and details of the day.
Step 2: Basic Adjustments (Exposure, White Balance, and Cropping)
Once you’ve selected your photos, it’s time to make some basic adjustments. These are the foundational steps in wedding photo editing.
Exposure:
If some images are too dark or too bright, adjust the exposure. You can use tools in Lightroom, Photoshop, or any photo editing software to correct this. The goal is to make sure the image is neither too washed out nor too shadowy.
White Balance:
Wedding photos often suffer from incorrect white balance, especially if the venue has mixed lighting sources. Correcting the white balance ensures that the colors look natural. If your photos have a yellow or blue tint, adjust the temperature and tint sliders until the colors appear true to life.
Cropping and Straightening:
A slight tilt can throw off an image’s composition. Use the crop tool to straighten photos and remove unnecessary distractions from the background. When cropping, remember the rule of thirds and try to create balance in the photo.
Step 3: Color Correction and Enhancement
Color correction is one of the most important aspects of wedding photo editing. It enhances the vibrancy of your photos while keeping the tones natural.
Adjusting Vibrance and Saturation:
Vibrance increases the intensity of colors without affecting skin tones, while saturation affects all colors in the image equally. For wedding photos, increasing the vibrance slightly helps the colors pop without making them look unnatural.
HSL (Hue, Saturation, and Luminance):
Fine-tuning the HSL values lets you adjust specific colors in your photo. For example, you can make the green in the foliage more vibrant or reduce the yellow tones in the bride’s skin. It’s all about enhancing the details that matter most.
Step 4: Skin Retouching and Imperfection Removal
Wedding photos are often close-up shots of the couple, so skin retouching is essential for creating beautiful images.
Removing Blemishes:
Use the spot healing brush or clone stamp tool to remove minor blemishes, scars, or stray hairs. Be careful not to overdo it—keeping the skin texture intact is essential for a natural look.
Smoothing Skin:
While you don’t want to over-smooth skin, applying a gentle skin-smoothing effect can help reduce harsh lines and give the couple a soft, glowing appearance. Use a tool like frequency separation in Photoshop to achieve a smooth but realistic skin texture.
Brightening Eyes and Teeth:
Enhance the eyes by brightening them slightly, making them appear more vibrant. Similarly, you can whiten teeth subtly to ensure a radiant smile without overdoing it.
Step 5: Background Enhancements and Distraction Removal
The background can make or break a photo. Sometimes, unwanted distractions, like a cluttered table or a person walking through the shot, may be present. Editing can help remove these distractions and ensure the focus remains on the couple.
Blur the Background:
You can apply a subtle blur background to make the couple stand out more. This technique, known as “bokeh,” helps focus attention on the main subject while creating a dreamy, romantic atmosphere.
Removing Unwanted Objects:
Using cloning and healing tools, remove objects that may detract from the composition, such as trash, power lines, or other guests in the background. It’s all about keeping the image clean and focused.
Step 6: Adding Artistic Effects and Final Touches
Now that the basic adjustments have been made, it’s time to add some creative effects to give your photos a polished, artistic touch.
Vignetting:
A subtle vignette darkens the edges of the photo, drawing the viewer’s focus to the center of the image. This effect can work particularly well for portrait shots of the couple.
Adding a Film or Vintage Look:
If you want to give your photos a timeless feel, try adding a film-like effect with grain or light leaks. This can create a nostalgic look that complements a wedding’s romantic nature.
Sharpening:
Finally, apply a bit of sharpening to ensure the details in the photo are crisp. Be careful not to over-sharpen, as it can introduce noise or make the image look unnatural.
Step 7: Exporting and Delivering the Photos
Once you’re happy with the final edits, it’s time to export your images and deliver them to the couple. Here’s what to keep in mind:
- File Formats: Export your photos in high-quality JPEG or TIFF formats for printing. You can also provide web-sized images in smaller file sizes for sharing on social media.
- Resolution: Ensure the resolution is high enough for printing, typically 300 dpi for print but 72 dpi for web use.
- Watermarking: If you’re a photographer, consider adding a subtle watermark to your images, especially the web versions. It ensures your work is credited when shared online.
Editing Wedding Photos for Different Settings
Wedding photos capture some of the most cherished moments of a couple’s life, and editing them appropriately for different settings ensures that each image reflects the atmosphere and mood of the moment. Whether you’re editing photos from a romantic outdoor ceremony, a chic indoor reception, or a cozy night-time event, understanding how to tailor your edits to the specific setting is critical to creating stunning, memorable images. Here’s how to approach editing wedding photos for different settings:
Outdoor Wedding: Embrace Natural Light and Vibrancy
Outdoor weddings, with their natural light and scenic backdrops, offer the opportunity to create vibrant and fresh-looking images. Editing outdoor wedding photos requires balancing natural light, colors, and the surrounding environment to maintain the beauty of the scene while highlighting the couple and their emotions.
- Adjust for Natural Light:
- Outdoor photos often involve varying light conditions, from bright sun to shaded areas. Use tools like exposure adjustments in Lightroom or curves in Photoshop to balance brightness and contrast, ensuring that neither the couple nor the scenery is too dark or overexposed.
- Enhance shadows and highlights to bring out details, especially when the sun casts shadows or bright highlights.
- Boost Vibrancy and Saturation:
- Outdoor weddings often feature lush greenery or vibrant floral arrangements, so emphasizing these elements can make your photos pop. Adjust the vibrance and saturation in Lightroom to bring out the natural colors without making them look unnatural.
- Color grading can enhance the overall feel—opt for warmer tones for a golden-hour effect or cooler tones for a crisp, modern look.
- Add a Soft Glow:
- For photos taken during sunset or in softer light, use tools like the Radial Filter in Lightroom to create a smooth, glowing effect around the couple. This will highlight their faces while maintaining the mood of the setting.
- SEO Keywords:
- “Outdoor wedding photo editing”
- “Enhance natural light in wedding photos.”
Indoor Wedding: Creating a Warm, Romantic Feel
Indoor weddings, particularly in venues like churches, ballrooms, or rustic barns, often have more controlled lighting. However, it can be challenging to manage artificial light and ensure that the photos still feel romantic, warm, and intimate.

- Adjust White Balance:
- Indoor venues often have yellow or tungsten lighting that can give a photo an orange hue. Use the white balance tool in Lightroom to correct the color tones and make the lighting appear more natural and flattering.
- Boost Warm Tones:
- Warm, golden hues are often beneficial for indoor weddings. Adjust the temperature settings in Lightroom to add warmth to your photos, giving them a cozy, romantic feel.
- If the lighting is cold or neutral, use the split-toning technique in Lightroom or color grading in Photoshop to add warmth to shadows and highlights, creating a more inviting atmosphere.
- Improve Contrast:
- Indoor settings with lower light can sometimes result in photos that feel flat. Use the contrast and clarity tools to enhance details and make the couple stand out from the background.
- Bokeh Effect:
- Many indoor wedding photos benefit from a bokeh effect (the blurred background) to keep the focus on the couple. Use the lens blur effect in Photoshop or manipulate the aperture settings in your editing software to create this dreamy background.
- SEO Keywords:
- “Editing indoor wedding photos”
- “Romantic indoor wedding photo edits”
Night-Time or Evening Wedding: Emphasizing the Mood and Lighting
Night-time weddings, whether outdoors under the stars or indoors with dim lighting, can pose unique challenges due to low-light conditions. However, they also provide the chance to create dramatic, mood-setting photos.
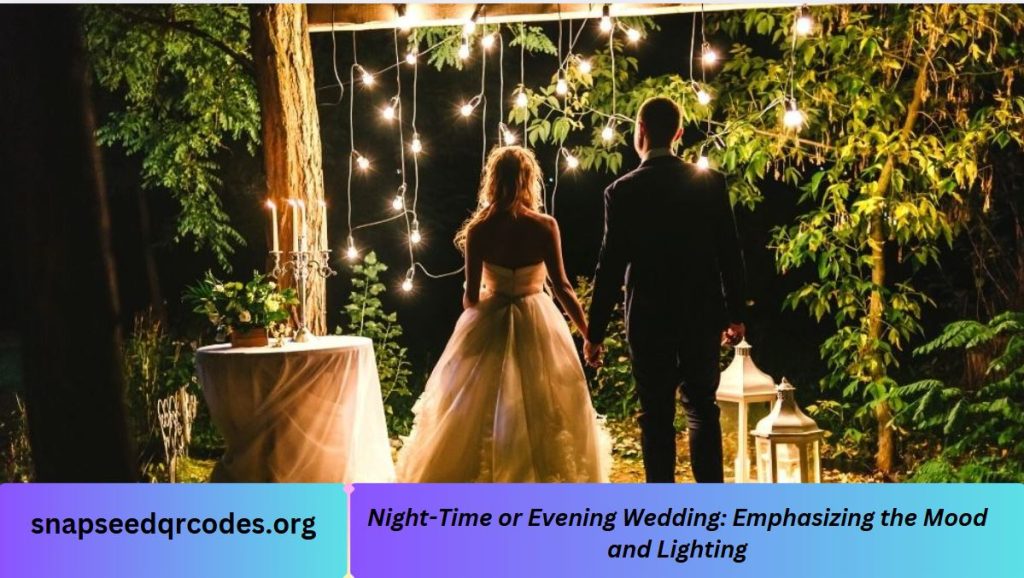
- Increase Exposure and Brightness:
- Night-time photos often appear too dark. Increase the exposure in Lightroom or Photoshop to brighten your images while keeping the mood intact. Be mindful of noise (graininess) that can occur when brightening dark images; use noise reduction tools to keep the photo clean.
- Enhance Light Sources:
- If there are light sources like candles, string lights, or spotlights, make these elements pop by adjusting the highlights and whites in your editing software. This will give the lights a more magical, ethereal feel without overexposing the rest of the image.
- Create Dramatic Shadows:
- To give the photos a more cinematic look, increase contrast and clarity to emphasize the shadows, making the lighting more dynamic. This technique works exceptionally well for dramatic portraits or group shots taken in dim light.
- Add a Cool or Warm Tint:
- For a more romantic, dreamy effect, use color grading to add a cool tint (if you’re going for a moody or wintery vibe) or a warm tint (for a cozy, golden atmosphere). This adjustment can enhance the overall theme of the wedding, whether it’s modern or vintage.
Output and Sharing Your Edited Wedding Photos
Once you’ve meticulously edited the wedding photos to perfection, the next crucial step is outputting and sharing them with the couple and other stakeholders. Whether you’re delivering the final images digitally or physically, it’s essential to ensure that the photos are presented in the highest possible quality while making the sharing process as seamless as possible. Here’s a comprehensive guide on how to output and share your edited wedding photos efficiently.
Choosing the Right Output Formats for Wedding Photos
The format you choose for outputting your edited wedding photos significantly impacts their quality and usability. Different platforms and uses require different formats, so it’s essential to deliver your images in the most suitable format.
- JPEG for High-Quality Prints:
JPEG is the most widely accepted format for printing photos and sharing them online. It’s a compressed format that balances quality and file size.
When saving in JPEG, ensure that the quality setting is at the highest level (usually 90-100%) to avoid any noticeable compression artifacts. This ensures that the images remain crisp and vibrant.
Best for: Prints, albums, social media sharing, email distribution.
- TIFF for Professional Printing:
TIFF is a high-quality format that retains all the fine details and layers, making it perfect for professional printing or archival purposes.
Since TIFF files are more significant than JPEGs, they’re not ideal for online sharing but are excellent for large-scale prints and archival storage.
Best for print shops, photo albums, and clients who request original files.
- PNG for Transparent Backgrounds:
PNG files are great if you need to share images with transparent backgrounds (for example, for overlays or logos). While not commonly used for wedding photos, they come in handy for specific creative edits or design purposes.
Best for: Design projects, custom graphics, overlays.
- DNG for Raw File Sharing:
If your client requests the raw files or you want to preserve the original unedited photos, you may choose to save and share them in DNG (Digital Negative) format, which retains all the data from the camera’s sensor.
Best for Clients who want raw, unedited photos or photographers who wish to archive original images.
Resizing and Preparing Photos for Digital Sharing
After selecting the right format, it’s essential to resize and prepare the photos based on how they will be shared. The requirements for photo resolution and size will vary depending on whether you’re sharing images via email, social media, or print.
Resize for Social Media:
- Each platform has its specifications for image size. Here’s a quick guide to resizing images for common social media platforms:
- Instagram: The ideal size is 1080px by 1080px for square posts, 1080px by 1350px for portrait posts, and 1080px by 566px for landscape posts.
- Facebook: For photo albums, aim for 2048px on the longest side, while cover photos should be 820px by 312px.
- Pinterest: Vertical images perform best, typically 1000px by 1500px.
- You can batch-resize images in Lightroom or Photoshop, ensuring they meet platform-specific requirements while maintaining quality.
Export for Email or Cloud Storage:
- If you’re sending images via email, keep the file sizes manageable to avoid delivery issues. A file size under 10 MB per image is generally safe for email.
- For higher quality or bulk image sharing, consider using cloud storage services like Google Drive, Dropbox, or WeTransfer. You can share a link with the couple for easy download access.
FAQs (Frequently Asked Questions)
Can I send high-resolution wedding photos through email?
While email is convenient, sending high-resolution photos can result in large file sizes that may not be suitable for delivery. If the images are too large, they might not be sent successfully. It’s recommended to reduce the resolution of photos or use file-sharing services like Google Drive, Dropbox, or WeTransfer for easier, high-quality photo delivery.
What is an online gallery, and how do I create one for wedding photos?
An online gallery is a web-based platform where clients can view, download, and share their wedding photos. Services like SmugMug, Pixieset, and Zenfolio allow photographers to create custom galleries where you can upload edited images, password-protect them for privacy, and offer options for ordering prints. These platforms provide a professional way to share pictures and ensure they remain accessible and secure.
How do I create a wedding photo album?
Creating a wedding photo album involves selecting your best shots and organizing them into a beautiful, cohesive layout. Many online services, such as Shutterfly or Mpix, allow you to design custom photo albums with personalized covers, layouts, and paper types. If you prefer more control over the album’s design, you can use design tools like Adobe InDesign to create custom layouts.
Should I watermark wedding photos before sharing them?
Watermarking wedding photos is a good practice to protect your work from unauthorized use. However, it’s essential to do so subtly, ensuring that the watermark does not obscure critical elements of the photos. A small, semi-transparent logo or your studio name is often enough. Watermarking is essential when sharing preview images online or through galleries, but it’s not necessary for client-delivered final photos.
What resolution should wedding photos be for printing?
For high-quality prints, wedding photos should ideally be at a resolution of 300 DPI (dots per inch) at the size they will be printed. For example, if you’re printing an 8×10-inch photo, the resolution should be 2400px by 3000px. Ensuring your images are high-resolution is crucial for sharp, detailed prints.
Can I sell wedding photos directly to clients from an online gallery?
Yes, platforms like Pixieset and SmugMug offer built-in e-commerce features that allow you to sell prints, digital downloads, and even albums directly through your online gallery. These platforms make it easy for clients to browse and purchase prints while providing you with a professional and secure way to handle transactions.
How do I ensure my edited wedding photos maintain high quality?
To maintain high quality, avoid excessive compression when saving edited images, especially for print. Use the highest quality settings when exporting JPEGs, and consider saving TIFFs for essential prints. Also, ensure that your computer and editing software are up to date and that you are working with the highest-resolution files throughout the editing process.
Conclusion
Creating beautiful memories through wedding photo editing is a meticulous and rewarding process that requires attention to detail, creativity, and the right tools. By following a step-by-step approach—from preparing your photos and selecting the right editing tools to fine-tuning colors and textures—you can enhance every special moment captured on the big day.
Throughout this guide, we’ve explored the importance of editing techniques, lighting adjustments, and preserving the natural beauty of the wedding without over-editing. We’ve also covered the significance of presenting your final images, whether through high-quality prints, digital downloads, or online galleries, and how to share them professionally with family and friends.
Ultimately, the goal is to deliver wedding photos that not only capture the essence of the day but also evoke the emotions and memories of the moment. By following these expert tips and best practices, you can ensure that your wedding photos become cherished keepsakes for years to come.